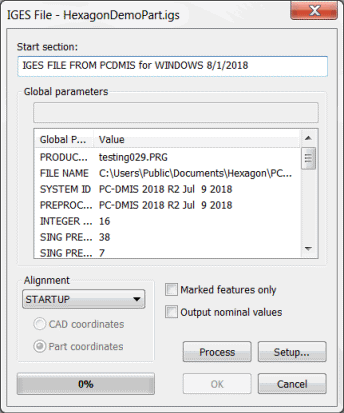
When you click the Export button during the IGES export process (File | Export | IGES), PC-DMIS displays the IGES File dialog box.

IGES File dialog box
The IGES File dialog box displays information about your selected IGES export in the Start section and Global parameters areas. It also allows you to select additional options for your IGES export.
To export an IGES file, do the following:
Select an alignment in the Alignment list.
You can export an IGES CAD model with measured features.
If the features are not measured with an alignment, PC-DMIS exports them according to the selected option (CAD coordinates or Part coordinates).
If the features are measured with more than one alignment, the CAD coordinates and Part coordinates options become available. Select the desired option.
To alter the display of the exported image, click the Setup button and then complete the IGES Write Setup dialog box. For help, see "Altering the Display of Exported IGES CAD".
To export only the marked features, select the Marked features only check box.
To cause PC-DMIS to create the export file from the nominal values in your measurement routine, select the Output nominal values check box. If you clear this check box, PC-DMIS exports the measured feature results.
Click the Process button to output the IGES data from the selected measurement routine. PC-DMIS indicates when the file is 100% processed.
Click the OK button to export the IGES file.
More: