Looking for XactMeasure GD&T dimensions? If so, see:

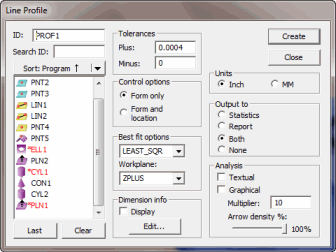
Dimension Line Profile dialog box
The profile's Line menu option (Insert | Dimension | Profile | Line) computes the two-dimensional profile error of a curve.

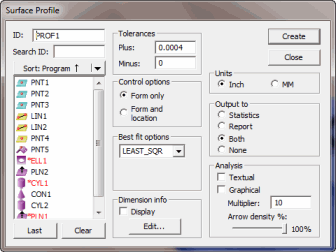
Dimension Surface Profile dialog box
The profile's Surface menu option (Insert | Dimension | Profile | Surface) computes the three-dimensional profile error of a surface or curve feature.
You can use any type of feature for a profile scan.
For dimensioning of Vision 2D Profile Auto-Features, the theoretical vectors are projected to the workplane. The deviations reported are 2D relative to this workplane rather than surface normal deviations.
By default, PC-DMIS uses the 2009 ASME standard to calculate the measured value of a profile dimension. You can switch between the current ASME standard and a newer ISO 1101 2004 standard. When doing a form and location profile dimension, the ISO standard calculates the measured value as 2 times the max deviation. The tolerance for this case is a diameter zone, all along the profile of the curve. This means the zone isn't just plus tolerance for one side and minus tolerance for the other. Additionally, the given single tolerance value is a diameter and not a radius.
To enable the ISO standard, access the PC-DMIS Settings Editor, navigate to the Option section, and set UseISOCalculations to 1.
More:
To Dimension a Feature Using the Surface Profile Option:
To Dimension a 2D Feature Using the Line Profile Option:
Tolerances for Surface Profile Dimensions
Tolerances for Line Profile Dimensions
Control Options for Surface Profile Dimensions
Control Options for Line Profile Dimensions