In the Excel Form Report dialog box (Insert | Modules | Excel Form Report), the Custom Fields group displays a list of fields that you can define. This group provides the flexibility to create your own fields that a dimension in PC-DMIS might not record.
To create a custom field, click the Add
button ![]() (on the right side of Custom
Fields) to open the Custom Field dialog
box.
(on the right side of Custom
Fields) to open the Custom Field dialog
box.
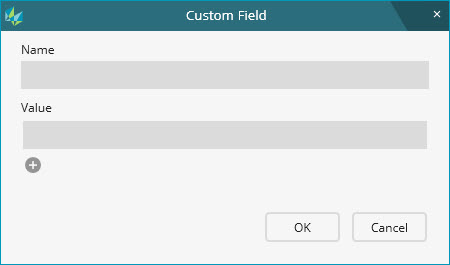
Custom Field dialog box
Name - This box defines the custom field's name.
Value
- This box defines the custom field's value. You can have a single value
or multiple rows of values. To add a row for a value, click the Add button ![]() . After you
add a row, PC-DMIS adds a check box and Remove
button (
. After you
add a row, PC-DMIS adds a check box and Remove
button (![]() ) for each row. To
set a value as the selected value, mark the check box next to the value.
In the Data tab, PC-DMIS displays this value
as the selected value for each dimension. For a single value, the row
for each dimension displays a box in which you can type or edit text.
For multiple values, the row for each dimension displays a list.
) for each row. To
set a value as the selected value, mark the check box next to the value.
In the Data tab, PC-DMIS displays this value
as the selected value for each dimension. For a single value, the row
for each dimension displays a box in which you can type or edit text.
For multiple values, the row for each dimension displays a list.
OK - This button creates the custom field.
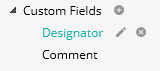
To edit a custom field,
click the custom field's name, and then click Edit
( ) to open the Custom Field
dialog box.
) to open the Custom Field
dialog box.
To remove a custom field,
click the custom field's name, and then click Delete
(![]() ).
After you delete the custom field, the column turns red in the Data
tab.
).
After you delete the custom field, the column turns red in the Data
tab.
Cancel - This button discards your changes.
Suppose that the AS9102 template requires the designator to set the importance of each dimension as major, minor, or critical.
Click ![]() to open
the Custom Field dialog box.
to open
the Custom Field dialog box.
In the Name box, type Designator.
In the Value box, type Major. Then, add two rows and type Minor and Critical, respectively.
Click OK. This creates a Designator custom field. It appears in the Custom Fields group.
PC-DMIS saves the custom field's information in the CustomFieldsSettings.xml file. You can find the file in this folder:
C:\Users\Public\Documents\Hexagon\PC-DMIS\<version>\ExcelFormReport\Settings
where <version> is the PC-DMIS version.