 from the
Probe Mode toolbar. Otherwise, you can use AutoShutter
to measure using a manual machine.
from the
Probe Mode toolbar. Otherwise, you can use AutoShutter
to measure using a manual machine.Since the approximate location of the part is known, you can re-measure the Datum Features under computer control with different Vision parameters to more accurately define them.
If you are using a DCC machine, select DCC
Mode from the
Probe Mode toolbar. Otherwise, you can use AutoShutter
to measure using a manual machine.
To re-measure the arc datum feature, do the following:
From the Auto
Feature toolbar, click Circle  to open
the Auto Feature (circle) dialog box.
to open
the Auto Feature (circle) dialog box.
Select the Vision tab.
Select the Magnification
tab  , and adjust
the magnification until you decrease it to the minimum setting (zoomed
out).
, and adjust
the magnification until you decrease it to the minimum setting (zoomed
out).
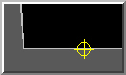
Move the machine so the lower edge of the Arc (Datum B) is within the Field of View (FOV).
Adjust the magnification to 75% of the maximum zoomed in value.
Select the Illumination
tab  and set
the Top Light to 0% (Off) and the Bottom Light to 35%.
and set
the Top Light to 0% (Off) and the Bottom Light to 35%.
Focus Z if necessary.
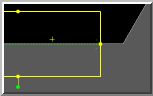
Use the mouse pointer to pick the first anchor point on the arc's edge.
Move the machine so the middle of the Arc (Datum B) is within the FOV.
Move the machine so the upper edge of the Arc (Datum B) is within the FOV. The software displays the target.
Change the Start Angle to 5 and the End angle to 85.
Edit the location parameters to exact values: X=0, Y=0, D=16
From
the Hit Targets tab  ,
under Density, double-click Normal,
and select High from the drop-down list
to change the density. Collecting a high density of points on this
arc improves its accuracy.
,
under Density, double-click Normal,
and select High from the drop-down list
to change the density. Collecting a high density of points on this
arc improves its accuracy.
Double-click on Strength box and type a value of 6.
Edit the Focus parameter set to automatically re-focus prior to measuring the circle feature. First, select the Focus from the drop-down list as shown below.
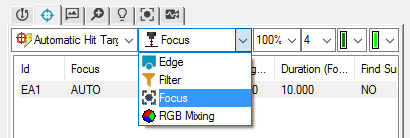
Change the Focus parameter set as follows: Focus = Yes, Range = 5, Duration = 4
From the Auto Feature dialog box, rename the default Circle Auto Feature to DATUM B.
Click Test to test the feature measurement.
Click Create and then Close.
To re-measure the line datum feature, do the following:
From the Auto
Feature toolbar, click Line  to open the
Auto Feature (line) dialog box.
to open the
Auto Feature (line) dialog box.
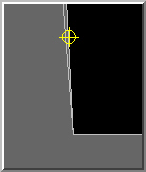
Move the machine so that the left end of the Front Edge (Datum C) is within the FOV.
If necessary, adjust the Z axis to regain focus.
Use your mouse pointer to pick the first anchor point on the left front edge.
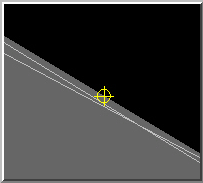
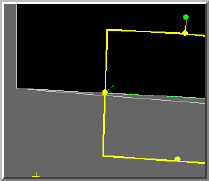
Move the machine so that the right end (just before the "V") of the Front Edge (Datum C) is within the FOV. Pick the second anchor point using your mouse pointer. The software displays the target.
From the Auto Feature dialog box, rename the default Line Auto Feature to DATUM C.
Click Test to test the feature measurement.
Click Create and then Close.