Before you can use a datum reference, you must define it in your measurement routine. You can do this with the Datum Definition command. To define a datum reference and create this command, from the menu, select Insert | Dimension | Datum Definition.
The Datum Definition dialog box appears:
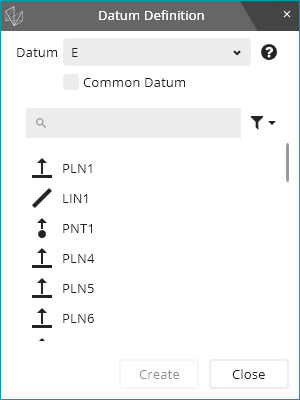
In the Datum box, type or select the datum name.
From the list of datum features, select one or more datum features.
If you select one feature, the datum reference represents a single datum. After you select that feature, PC-DMIS filters the feature list so that it only shows other features with the same characteristics. For example, if you select a circle with a diameter of 25mm, it filters the list by other circles of that same diameter. This makes it easier for you select additional, similar features so that your datum reference represents a datum pattern.
Click Create.
As needed, continue to use the dialog box to create additional datums and common datums.
Datum - This box defines the name of the datum reference. It is typically a single letter such as E or a sequence of a few letters such as BG.
Common Datum - This check box lets you define a common datum. If you mark this check box, the feature list doesn't show features anymore; instead, it shows datums you have already defined. For example, to define the common datum A-B, first, define datum A, then, define datum B, and finally, define the common datum A-B.
The Datum Definition command's Edit window syntax in Command Mode looks like this:
DATDEF/A,FEATURES=PLN2,,