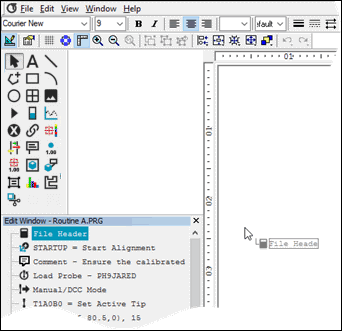
As the "Custom Report Generation" topic describes, you can drag features and other items from the Edit window in Summary mode into the Custom Report Editor (File | Reporting | New | Custom Report).

Example of dragging a File Header object onto the editing area (the Page object)
When you drop an item into the editor, the appropriate label for that feature, as defined by the Page object's Rule Tree Editor, automatically gets created:

Example of a dropped File Header object
Replacing Information by Dropping on Top of Existing Labels
If you drag an item on top of an existing label, like this:
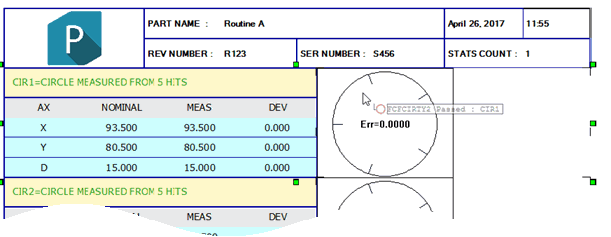
Example of dropping a Dimension on top of an existing label
PC-DMIS replaces the existing label with the dropped item:

Example of the updated label
Dropping a Floating Label by using the Alt Key
If you drag an item on top of an existing label while you press the Alt key, like this:
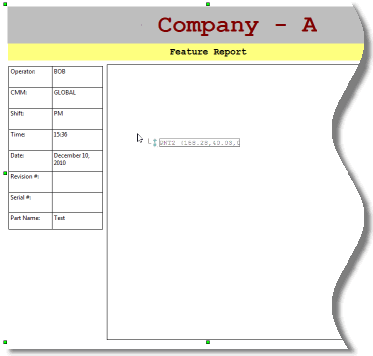
Example of Dragging on top of a Large Page-Size Label
PC-DMIS does NOT replace the information in the label with what you dropped. Instead, it floats the new label on top of the existing label.

Example of dropping onto a large page-size label with Alt key pressed
You may find this useful if you have a large custom label that covers much of the page, and you want to place new labels on top of that label instead of updating it.
Dropping Feature or Dimension Data on a CADReportObject
If you drag a feature or dimension on top of a CADReportObject (CRO), like this:
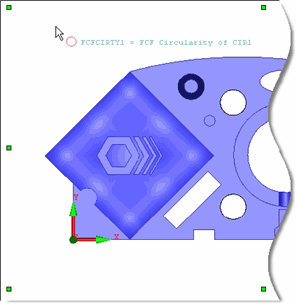
Example of dropping a Dimension on top of a CRO
PC-DMIS adds the appropriate label object and leader-line for the dropped object on top of the CRO. The label that PC-DMIS shows depends on the label specified in the CRO's Rule Tree Editor and not the Rule Tree Editor for the Page object.

Example of a dropped dimension on top of a CRO
Dropping Colormaps on a CADReportObject
If you drag a colormap on top of a CadReportObject (CRO), like this:

Example of dropping a surface colormap onto a CRO
PC-DMIS displays the colormap on the CRO:

Example of dropping a surface colormap onto a CRO
For more information on using colormaps with the CRO, see "Colormaps and the CadReportObject".
Dropping Data on an Analysis Object
If you drag a dimension on top of a Analysis object, like this:
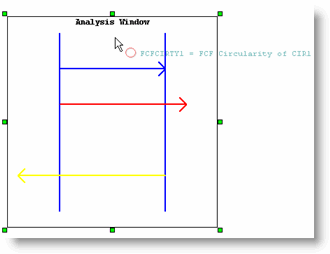
Example of dropping a Dimension on top of an Analysis object
PC-DMIS displays the graphical analysis information for the dropped dimension inside the Analysis object.
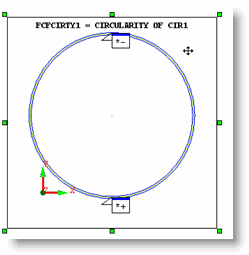
Example of a dropped Dimension on top of an Analysis object
Dropping Data on a DimensionHistogram Object
If you drag a dimension on top of a DimensionHistogram object, like this:

Example of dropping a Dimension on top of a DimensionHistogram object
PC-DMIS displays the histogram information for the dropped dimension inside the DimensionHistogram object.

Example of a dropped Dimension on top of a DimensionHistogram object
Invalid Drop Areas
If you try to drop an item on top of an invalid object (for example if you drag a feature or dimension on top of a Text object), PC-DMIS changes your pointer to display a red "not allowed" symbol to show you that you cannot drop that item there.

Example of an invalid drop area for a dragged dimension
Using Shift and Ctrl Keys When Dropping
While you perform the drop of a command (such as a feature or dimension), if you hold down the Shift or Ctrl key and release the button, PC-DMIS does the following:
Shift key - PC-DMIS inserts a CommandTextObject for that item. This lets you display the information for that item in a textual, non-table format.
Ctrl key - PC-DMIS displays an Open dialog box, which enables you to select a different label template for the item.
When performing a drop of a data item, if you hold down the Ctrl key, PC-DMIS displays the evaluated expression for the data item as well as the descriptive string of text from the Summary mode that precedes it.
Dropping Multiple Items
You can drag multiple items at once from the Edit window in Summary mode. This is useful if you want to quickly add several items into your report.
To select an entire list of consecutive items, click the first item, press Shift on the keyboard, and click the last item. All items between them are selected.
To select or deselect individual items to or from your existing selection, press and hold the Ctrl key while you click on items.
Once you have selected a list of items, drag them into the editor.