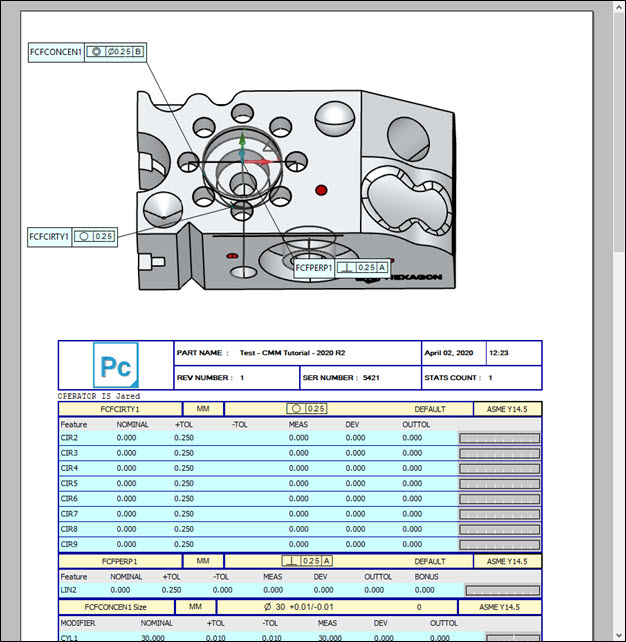
After PC-DMIS executes the measurement routine, it automatically prints the report to the designated output source that you specify in the Output Configuration dialog box (File | Printing | Report Window Print Setup). Because you chose the PDF output in a previous step, the report is sent to a PDF file in the same directory as the measurement routine.
Select View | Report Window to view the final report inside the Report window:

The above image shows the first page of the Text and CAD report. Notice that there isn't any measurement data. That is because this image came from PC-DMIS in offline mode (without a real CMM). If you execute the measurement routine with a real CMM that probes a real part, the report contains actual measured data.
With the Report window, you can display variations of the same measurement data when you apply different pre-made report templates provided with PC-DMIS. You can also right-click on different areas of the report to toggle the display of available items.
For information on the reporting capabilities of PC-DMIS, see the "Reporting Measurement Results" chapter in the PC-DMIS Core documentation.
Go to the next step: "Best Practices"