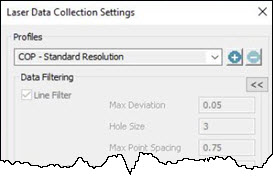

The Profiles section of the Laser Data Collection Settings dialog box (Operation | Pointcloud | Data Collection) allows you to select from a list of pre-configured scan profiles. You can also create your own scan profiles. You must use the Line Filter when scanning with the Mesh display option.
You can click the Collapse
button  to hide sections
of the Laser Data Collection Settings dialog
box or click the Expand button
  to display hidden sections
of the dialog box.
The pre-configured scan profiles that come with PC-DMIS are:
Profile Name |
Description |
Settings |
|
Pointcloud (COP) Profiles |
Metric |
Standard |
|
COP - No Filters |
This is the default CMM laser scan profile for new installations. With this profile selected, PC-DMIS unchecks all filters set on this dialog box, and stores all points from the laser sensor in the COP. Since this is the default profile, you cannot edit it. |
|
|
COP - Standard Resolution |
This is the default Portable laser scan profile. You can use this profile to scan parts with details of 1 mm or larger. |
|
|
COP - Fine Resolution |
You can use this profile to scan parts with details of 1 mm or smaller. |
|
|
COP - Very Fine Resolution |
You can use this profile to scan parts with details of 0.5 mm or smaller. |
|
|
Mesh Display Profiles |
Metric |
Standard |
|
Mesh - Normal |
The scan speed and the drawing of scanned points is good, and the mesh display has medium resolution. |
|
|
Mesh - Detailed |
The scan speed and the drawing of scanned points is slow, but the mesh display shows more details. |
|
|
Mesh - Smooth |
The scan speed and the drawing of scanned points is faster, but the mesh display resolution is low. |
|
|
PC-DMIS stores the user-defined scan profiles in the "C:\Users\<user_name>\AppData\Local/Hexagon\PC-DMIS\<version>\ScanningProfiles" folder, where:
<user_name> is the name of the user logged onto the computer who is running the PC-DMIS application.
<version> is the version of the installed PC-DMIS application.
You cannot change the configurations of the pre-configured profiles. If you do make a change, PC-DMIS renames the profile to "Custom(n)", where "(n)" represents a numerical index value that updates for each new custom profile PC-DMIS creates. For example, the software names the first custom profile that you create as "Custom1", the second one that you create as "Custom2", and so forth. You can click inside the profile name box and edit the name of any custom profile.
If you open a measurement routine from an earlier version of PC-DMIS, but the Data Collection settings do not match any of the existing profiles, the software automatically creates a new custom profile with those settings.
PC-DMIS uses the last-used profile for any new measurement routine.
You can click the Add button
 to make a copy of the current profile. You can then rename it and make
any changes to the profile's configuration. Click the Delete
button
  to delete the current profile.
More:
Laser Data Collection Settings