To add a user or a group into the Protect-Programmer, follow these steps:
Prerequisites:
Protect LMS License
Administrator access to the computer
Install the Protect Viewer installer (included with the PC-DMIS installer). This creates the Protect-User and Protect-Programmer group in the Local Users and Groups folder on your computer.
To open the Edit local users and groups dialog box, follow either of these two ways:
Type local in the search box on the taskbar and choose Edit local users and groups from the results.
Press Windows + R. In the Run dialog box, type lusrmgr.msc, and click OK.
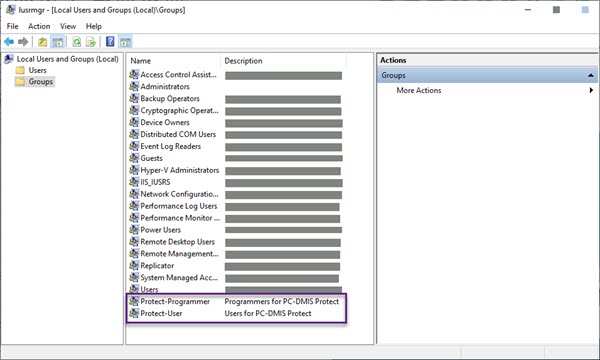
From the left pane, click Groups. This displays the list of groups on your computer and contains the Protect-User and Protect-Programmer groups.
Local Users and Groups screen with the Protect-Programmer group
Double-click Protect-Programmer to open the Protect-Programmer Properties dialog box.
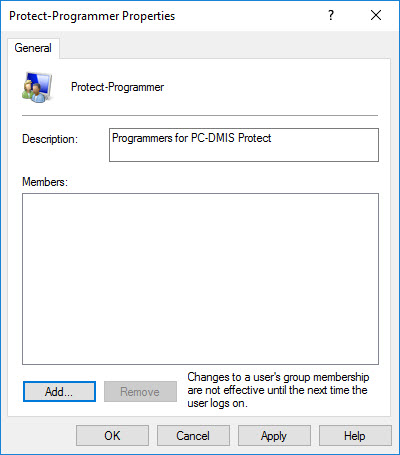
Protect-Programmer Properties dialog box
From the Protect-Programmer Properties dialog box, click Add to open the Select Users, Computers, Service Accounts, or Groups dialog box.
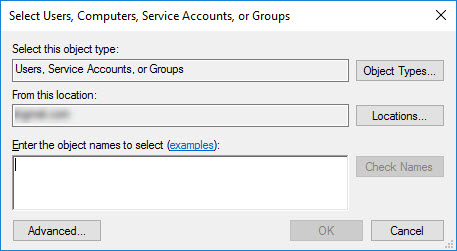
From the Select Users, Computers, Service Accounts, or Groups dialog box, click Locations to open the Locations dialog box. You can connect the account as a network user or a local user.
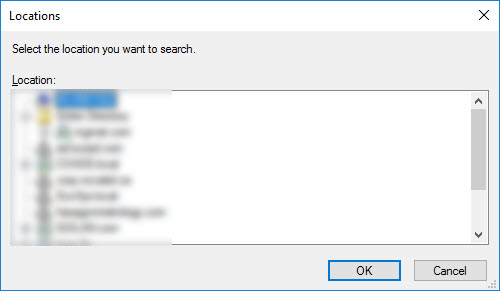
To connect the account as a network user, from the Locations dialog box, select the network location. Click OK to close the Locations dialog box.
To connect the account as a local user, from the Locations dialog box, select the computer name. Click OK to close the Locations dialog box.
From the Select Users, Computers, Service Accounts, or Groups dialog box, in the Enter the object names to select box, type your user name and click Check Names. If you do not see your user account listed and your computer is part of a company network, you need to make sure that you are connected to that network. If you are outside of the company network, you need to connect via VPN.
If you are connected to a network, the box displays an entry that displays your network's name.
If you are not connected to a network, the Name Not Found screen appears.
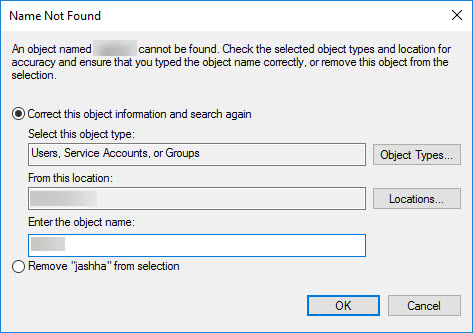
Name Not Found screen
You can also add a local group or network group into the Protect-Programmer group. This adds all the members in that local or network group into the Protect-Programmer group.
Click OK to close the Select Users, Computers, Service Accounts, or Groups dialog box. In the Protect-Programmer Properties dialog box, the Members area displays the user name or group that you added in step 6.
Click OK to close the Protect-Programmer Properties dialog box.
To apply the changes, you must sign out of Windows and then sign in again.
You have successfully added the user or group into the Protect-Programmer group. You can follow the same steps to add the user or group into the Protect-User group.
Whenever you make modifications to the Protect-User or Protect-Programmer group, you must sign out of Windows and then sign in again to apply those changes. After you add a network group to the Protect-User or Protect-Programmer group, if you then make modifications to the network group, you must be connected to the network to apply those changes.