In PC-DMIS CMM, you can use the Probe Toolbox to perform various probe-related manipulations specific to contact probes. If you use the Probe Toolbox dialog box by itself, it contains only two tabs. Additional tabs appear when you view the toolbox embedded within the Auto Feature dialog box.
Using the Probe Toolbox Dialog Box
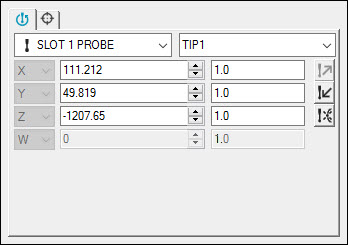
Select View | Other Windows | Probe Toolbox. The Probe Toolbox dialog box opens:

Probe Toolbox for a contact probe
Complete the properties on the two tabs that appear:
 Position Probe tab - Use this tab to switch
between existing configured probes and probe tips, view the current
probe's location, access the Probe Readouts window, and remove
probing hits from the hits buffer.
 Hit Targets tab - Use this tab to view
the hits used to measure the feature and the XYZ values for each
hit.
Using the Probe Toolbox Embedded Within the Auto Feature Dialog Box
Open the Auto Feature dialog box. For help, see "Inserting Auto Features".
Select the Auto feature for the measurement strategy that you want to use.
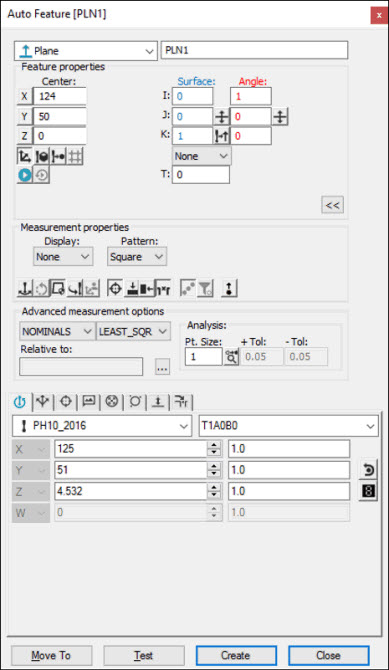
Click the >> button. The Measurement properties area, Advanced measurement options area, and Probe Toolbox (with additional tabs in the lower portion of the dialog box) appear.

Sample Auto Feature dialog box
This documentation set does not discuss the options in the Measurement properties area and Advanced measurement options area. Since many of these options are common to the different configurations of PC-DMIS, the PC-DMIS Core documentation contains this information. For in-depth information on the options in these areas, see the "Creating Auto Features" chapter in the PC-DMIS Core documentation.
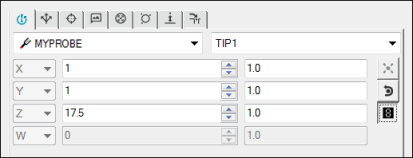
The Probe Toolbox appears in the lower portion of the dialog box and displays the tabs for the Default PC-DMIS Measurement Strategy. The probe-related tabs and manipulations for standard contact probe types within the Auto Feature dialog box includes additional tabs. For example:

Probe Toolbox embedded within the Auto Feature dialog box
Complete the properties on the tabs.
 Position Probe tab - Use this tab to switch
between existing configured probes and probe tips, view the current
probe's location, access the Probe Readouts window, and remove
probing hits from the hits buffer.
 Measurement Strategies tab - Use this
tab to load different internal strategies for a specific type
of Auto feature and change the way the feature executes.
 Hit Targets tab - Use this tab to view
the hits used to measure the feature and the XYZ values for each
hit.
 Feature Locator tab - Use this tab to
define and view feature location instructions.
 Contact Path Properties tab - Use this
tab to modify properties that affect the probe path, such as number
of hits, depth, hits per level, and so on.
 Contact Sample Hits Properties tab - Use
this tab to modify sample hits properties.
 Contact Auto Move Properties tab - Use
this tab to modify properties for Auto Move (or Avoidance Move).
 Contact Find Hole Properties tab - Use
this tab to modify properties for locating a hole.