You should have taken all three hits similar
to shown here: 

This topic describes how to calibrate the SCR200 Probe Changer.
When you click the Calibrate button on the Calibrate tab in the Probe Changer dialog box (Edit | Preferences | Probe Changer), the first prompt appears:
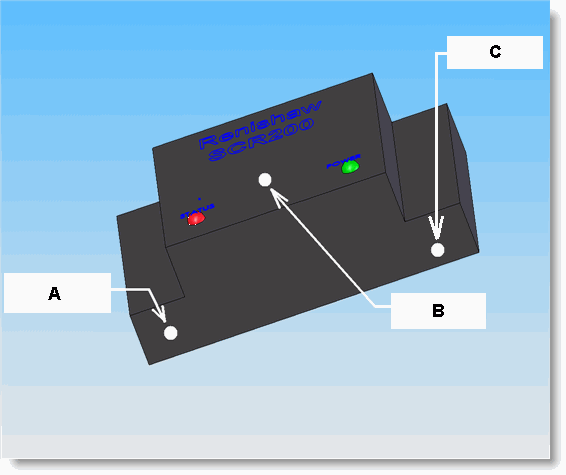
Open lids 3 and 4 and remove any probe from ports 3 and 4. When ready, please take a hit on the front face of the divider between ports 3 and 4. The hit should be taken on the lower widest portion as close as possible to the outer edge next to port 3.
Open lids 3 and 4. Remove any probes from those ports.
Click OK.
Take one hit on the front face of the probe changer's center post. A second prompt appears and asks you to take the second hit:
Please take a hit on the top of the middle of the rack. After completing this hit DCC calibration will begin.
Click OK.
Take the second manual hit on the top of the center post. A third prompt appears and asks you to take the final hit:
Please take a hit on the front face of the divider between ports 3 and 4. The hit should be taken on the lower widest portion as close as possible to the outer edge on the right-hand side next to port 4. After completing this hit DCC calibration will begin.
Click OK.
Take the third manual hit again on the front face of the center post.
WARNING: When you do this, the machine moves. To avoid injury, stay clear of the machine. To avoid hardware damage, run the machine at a slower speed.
You should have taken all three hits similar
to shown here:
PC-DMIS takes the remaining hits in DCC mode:
1 hit each on the left and right inside sides of port 3.
1 hit each on the left and right inside sides of port 4.
After the calibration, the Probe Changer dialog box appears.
Select the Mount Point tab:
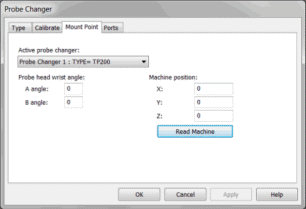
Probe Changer dialog box - Mount Point tab
Confirm the wrist angle for the change cycle by typing in the angle in the A Angle and B Angle boxes.
Specify the rack's safe position (a position where probes can be swapped in and out safely) in machine coordinates. You can type this manually into the X, Y, and Z boxes in the Machine Position area, or click the Read Machine button.
Select the Ports tab:
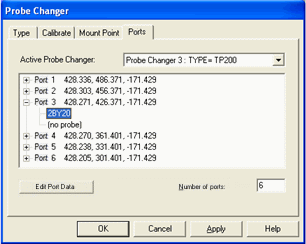
Probe Changer dialog box - Ports tab
To define the contents of each port in the rack, expand the plus sign (+) for each port and then double-click the (no probe) item. A list of available probes appears. For example:
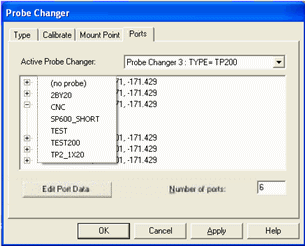
List of available probes
Select the probe file to add to the current port.
If necessary, adjust the port position. Select the port's position and then click the Edit Port Data button. The Probe Changer Port Data dialog box appears. For example:
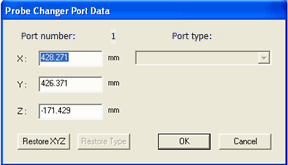
Probe Changer Port Data dialog box
Modify the X, Y, Z position of the port.
Click OK to close the Probe Changer Port Data dialog box.
Click OK to close the Probe Changer dialog box.