To insert the Check Calibration Limits command into the Edit window, select Insert | Modules | Check Calibration Limits. This action inserts the following command:
CHECKCALIBRATIONLIMITS/
During Execution
You can use the Check Calibration Limits command with or without the On Error command in a measurement routine. If you use the On Error command, you need to place the On Error command before the Check Calibration Limits command.
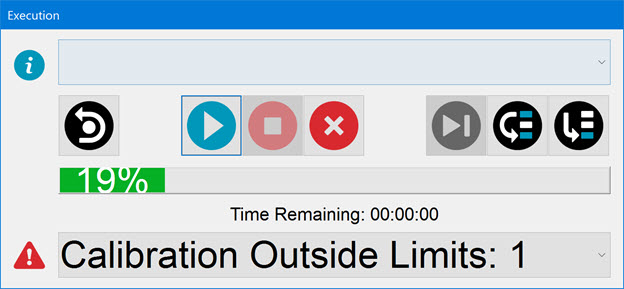
Without an On Error command - If PC-DMIS encounters an error during execution, the Execution dialog box displays an error code to indicate the reported error. For more information on the error codes, see "Error Codes" below. PC-DMIS also displays the error names in the status bar.

Execution dialog box
You can cancel the execution or skip the Check Calibration Limits command and continue the measurement with errors.
With an On Error command - If PC-DMIS encounters an error during execution, the On Error command checks for errors. PC-DMIS either causes the execution to jump to the specified label or sets a variable's value to the one based on what you set in the On Error dialog box. PC-DMIS also displays the error names in the status bar. For more information on the error codes, see "Error Codes" below.
An error code is based on a bit mask. The error code is created with an addition of a bit of each error. The following table lists the error codes and errors:
| Error Code | Error(s) |
| 1 | Calibration Validity |
| 2 | Calibration Interval |
| 3 | Calibration Validity and
Calibration Interval |
| 4 | Standard Deviation |
| 5 | Calibration Validity and
Standard Deviation |
| 6 | Calibration Interval and
Standard Deviation |
| 7 | Calibration Validity,
Calibration Interval, and Standard Deviation |
| 8 | Tip Diameter |
| 9 | Calibration Validity and
Tip Diameter |
| 10 | Calibration Interval and
Tip Diameter |
| 11 | Calibration Validity,
Calibration Interval, and Tip Diameter |
| 12 | Standard Deviation and
Tip Diameter |
| 13 | Calibration Validity,
Standard Deviation, and Tip Diameter |
| 14 | Calibration Interval,
Standard Deviation, and Tip Diameter |
| 15 | Calibration Validity,
Calibration Interval, Standard Deviation, and Tip Diameter |