Manually Bisecting the Calibration Sphere
If you moved the qualification sphere or do not know
its location, you must manually bisect it before you start the qualification.
During this process, PC-DMIS prompts you when to move the machine. The
prompt instructs you to bisect the calibration sphere and position the
sphere in the center of the keystone.
To manually bisect the sphere:
Leave the PC-DMIS Message open.
Switch to the Laser
tab on the main Graphic Display window.
Click the Start/Stop
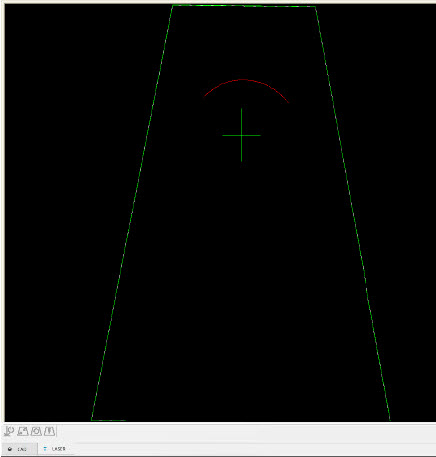
button. This turns on the laser. A flashing red arc appears in the
graphic area of the Laser tab and a green
crosshair. The red arc is where the laser hits the calibration sphere.
Center the cross hair inside the circular region
formed by the arc by moving the machine with the jog box. The red
arc moves as you move the machine. If you imagine that the flashing
arc indicates the edge of a circle, the center point of this imaginary
circle should optically align with the center of the cross hair.

Aligning the arc
Once you have aligned the arc, click the On/Off button again. This turns off the laser.
Click OK in the PC-DMIS
Message to accept the change you made of aligning the arc. PC-DMIS
stays in Execute mode, and the laser sensor moves through a series
of defined positions used to calibrate your tip.
At each position, the laser beam hits the sphere
in a stripe and the laser sensor collects the data from that stripe.
The collected data and the corresponding machine position determine
the sensor’s mounting orientation on the machine.
Once execution finishes, PC-DMIS returns to
Learn mode and shows the Probe Utilities
dialog box.
HP-L Automatic Self-Centering of Tool Sphere
The HP-L laser sensor provides automatic self-centering
(bisecting) of the calibration tool sphere during calibration. This happens
if you click Yes when PC-DMIS displays the message
"Has the sphere moved?". From the Graphic Display window, click
the Laser tab. You can drive the laser sensor
to the center of the sphere.
You have two possibilities at this point:
You can manually bisect the sphere and bring
it in the center of the keystone and then click OK
to start the laser calibration.
Display a portion of the calibration sphere
in the Laser View and then click the Probe Enable
button to automatically center the sphere. When completed, press the
OK button to complete the laser calibration.
When PC-DMIS determines that the calibration sphere
has been moved, PC-DMIS displays a message to confirm whether you are
ready for the calibration.
Follow the instructions as described in the message
box. Click the OK button when done.
For convenience, during the auto-centering procedure, the
software shows the laser sensor alignment stripe in yellow.
