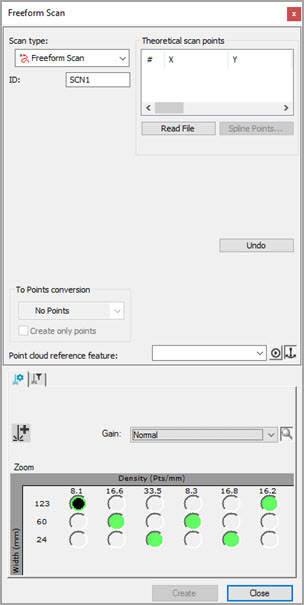

Freeform Scan dialog box
The Freeform Scan method defines a scan path that is not restricted to following any particular rule set. You can define the scan path to move in any direction, including crossing back over itself.
Creating a Freeform Scan
Place PC-DMIS into DCC mode.
Select the Insert | Scan | Freeform menu item. The Scan dialog box opens with the Freeform Scan already selected in the Scan type list.
You need to define the scan path. You can do this by using the Read File option or by the Manual Points method.
If needed, you can delete individual points. To delete them, select them one at a time in the Theoretical Path area and press the Delete key on your keyboard.
Once five or more Theoretical Points, use the Spline Points option to better define the path.
If needed, make additional modifications to your scan.
In the Pointcloud reference feature box, type the ID of the pointcloud object that will receive the surface data.
In the Hit Type list, you can select Surface Point in case you want to convert scan data into Surface Point laser commands. PC-DMIS inserts these commands into the Edit window when you click the Create button.
WARNING: Once you mark the Measure check box, and click Create, you must keep clear of the machine. The software starts the measurement routine and the machine will move. Injury may result if you are not clear of the machine.
Click the Create button. PC-DMIS inserts the scan into the Edit window if the Create only points check box is not selected. If you have the PC-DMIS AutoWrist method enabled but don't have any calibrated tips, PC-DMIS displays a message that informs you when it adds new probe tips that need calibration. In all other cases, PC-DMIS asks you whether it should use the closest calibrated tip to the needed tip angle or add in a new non-calibrated tip at the needed angle.
More: