Calibrate Illumination
This calibration procedure allows you to calibrate the
lamps for your machine. Lamp calibration ensures that the illumination
range is linear, and that changing magnification (Pixel
Size) on zoom cells will not significantly change the illumination
on the part within the capability of the hardware.
You should calibrate your optical system's lighting
at these times:
Whenever you change or replace a lamp, you
should recalibrate that lamp.
Whenever you have a significant change to the
lighting within the room.
Periodically throughout the life of the lamp.
When you change the brightness or gain setting
on the camera.
When the optics are replaced.
When the zoom cell is repaired.
When the camera is replaced.
Prior to calibrating Parcentrality/Parfocality
when you "Calibrate Optics"
since this is required for this calibration.
To calibrate lamps, follow these steps:
On the Calibrate Probe
dialog box, from the drop-down list, select Calibrate
Illumination.
Click Calibrate to
show the Calibrate Illumination dialog box
with the calibration date for each lamp in parenthesis. If you haven't
calibrated a lamp the text in parenthesis says "Uncalibrated".
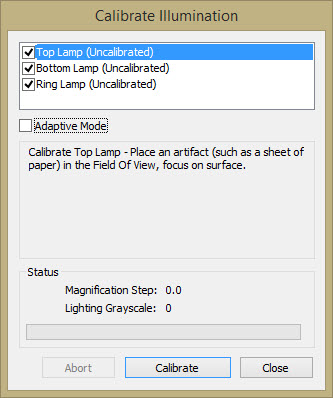
Calibrate Illumination dialog box
Select the check box next to the lamp that
needs to be calibrated.
Prepare for calibration as directed according
to the lamp type:
Sub-stage (bottom/profile)
lamps require the stage to be cleared during calibration, with
the image focused on the stage.
Top (surface/ring)
lamps require an artifact or piece of paper to be in the Field
of View, with the image focused on the surface.
Mark the Adaptive Mode
check box to apply the adaptive calibration mode to the calibration
process if required.
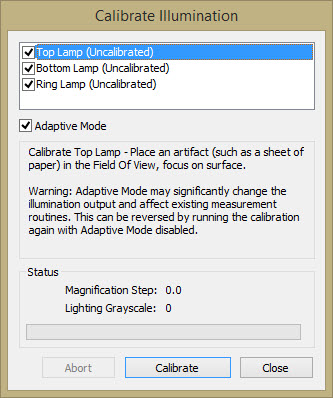
Calibrate Illumination dialog box with Adaptive
Mode check box marked
The Adaptive Calibration mode
may cause issues with existing measurement routines. Without the Adaptive
Calibration mode, the levels across some hardware configurations were
inconsistent. The actual illumination seen in the camera did not match
the commanded value. After the Adaptive Calibration mode illumination
calibration, the machine illumination seen in the camera will match the
commanded value.
Click Calibrate.
The calibration process begins. The process takes several minutes.
During calibration
on systems with a zoom cell, PC-DMIS Vision selects different magnifications
for illumination measurement as indicated by the Magnification
Step value. This value displays the current magnification and
corresponds to the value displayed in the Magnification
tab of the Probe Toolbox.
The calibration
also sets the illumination intensity corresponding to the different
commanded illumination values at different magnifications. The Lighting Grayscale indicates the intensity of
this illumination. The values range from 0 (black) to 100 (white).
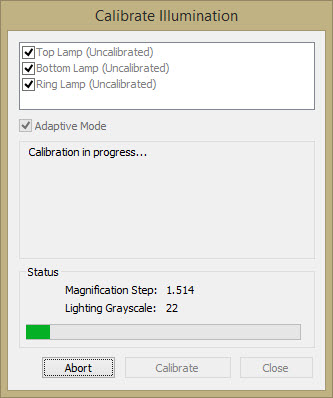
Calibration Illumination
- in progress
Once the calibration
finishes, the Calibrate Illumination dialog
box displays the new date for the calibrated lamp.
After PC-DMIS completes the calibration process,
click the Close button or repeat steps 3
through 6 to calibrate another lamp.
The Abort
button is only available during a calibration. This button stops the calibration,
aborts any data collected during the process, and reinstates any pre-existing
calibration files for the current lamp.