If you right-click in the Report window, PC-DMIS displays a shortcut menu with menu items that affect how objects appear in the Report window. Certain menu items only appear if you right-click on specific underlying objects in the Report window. The various menu items you can access from the Report window's shortcut menu are discussed in the table below:
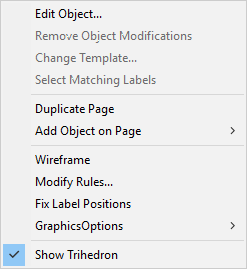
Shortcut menu with mouse pointer on report's graphic display
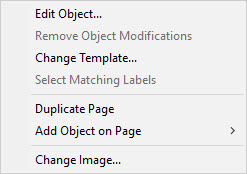
Shortcut menu with mouse pointer on report's header

Shortcut menu with mouse pointer over a custom report's thumbnail image in the Preview Pane
Edit
Object
This option allows you to modify the current object in the Report window
from its default state.
If you right-click on a label object in the Report window, the Label Properties dialog box appears, so that you can modify that label.
If you right-click on the TextReportObject (essentially any white space text at the end of your report or any non-table-like reporting text), the Report dialog box appears so that you can determine what gets included in your report.
You can press Shift and right-click on any label object to display the Report dialog box.
For more information, see "Changing the Report Window's Contents" in the "Reporting Measurement Results" chapter.
Hide
Selected Labels
This option hides any selected labels used with the CadReportObject.
Select the labels you want to hide and then right-click on one of the
selected labels for this menu item to appear. To select multiple labels
at a time, drag a box around the desired labels with the mouse or hold
down the Ctrl key and click on the desired labels.
Show
Hidden Labels
This option shows all hidden labels. Right-click on the CadReportObject
for this menu item to appear.
Remove
Object
This option removes a selected label object or section cut profile object
that you added using the Add Object on Page
submenu.
You should not use the Delete key when you try to remove selected objects; doing so deletes selected commands in the Edit window instead.
Remove
Object Modifications
This option returns the object you right-click on to its original state
and removes any modifications you may have made using the Edit
Object menu item or made resizing or repositioning supported objects.
Change
Template
This option displays an Open dialog box, so that
you can change the template used to display and format the data from the
underlying command. Only those templates specified to work with the command
appear in the dialog box.
If you have multiple labels selected when you use this option (such as after you use the Select Matching Labels menu item), PC-DMIS applies the label change to all the selected labels.
Select
Matching Labels
This option appears when you right-click on a label. This option selects
all labels on the current page that use the same label template as the
label on which you clicked.
Duplicate
Page
This option creates an identical page of the one on which you right-click
immediately following the current page. You may find this helpful to organize
labels that can't fit on one page across multiple pages.
Duplicated pages show a red cross icon at the top-left area of the page.
![]()
Sample Cross Icon Indicating a Duplicated Page
To remove a duplicated page, right-click on it and select Remove Duplicated Page.
Remove
Duplicated Page
This option only appears in the menu when you right-click on a previously
duplicated page. Select it to remove the duplicated page from the report.
Add Object
on Page | Section Cut Profile
This option inserts a section cut profile of your part model into the report.
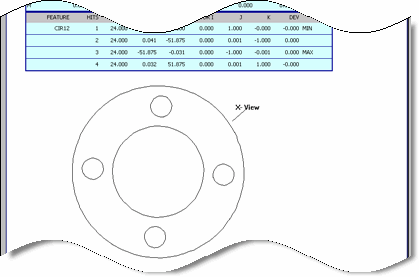
Sample Section Cut Profile
After you select this option, use your mouse and drag a box in the Report window to insert the section cut profile. For detailed information, see the information in the "SectionCutObject" topic in the "Reporting Measurement Results" chapter.
You can use this method to insert multiple cutaway views into your report.
Change
Image
This option only appears in the menu when you right-click on a header label
template (such as FILE_HEADER.LBL). When you choose this option, you can
use an Open dialog box to choose a new image
for the report's header. After you locate the new image and click Open, the report uses that image. This action
also updates the underlying label template (.lbl) with the new image.
Add Object
on Page | Custom Label
This menu item lets you insert a custom label object on the fly into the
active report. This type of label insertion process is not tied in any
way to the Rule Tree
Editor.
Select this menu item and then drag a box in the Report window. An Open dialog box appears so that you can insert a selected label template on the fly into the current page of the report.
Remove
CAD Report Object Pan/Zoom/Rotate MOD
This menu item lets you remove just pan, zoom, and rotate modifications
for the CadReportObject. Other modifications (such as section cuts, various
label definitions, solid or wire displays and so forth) are not affected.
Select
Labels
This menu item allows you to easily select multiple labels across different
sections in your report.
When you select this item, PC-DMIS displays the Select Labels dialog box. This dialog box displays the labels in your report that are tied to a CadReportObject. Select any labels from this dialog box; when you click OK on the dialog box, PC-DMIS selects the corresponding labels in the report.
You can limit the labels that appear in the dialog box by feature type, dimension type, or all commands.
For more information, see "Changing the Report Window's Contents" in the "Reporting Measurement Results" chapter.
Wireframe
This menu item toggles the display of the selected CadReportObject by displaying
the model as either a wireframe or a solid. This menu item only appears
if you right-click on a CadReportObject in your report.
Modify
Rules
This menu item displays a simplified version of the Rule
Tree Editor dialog box. You can use the Disable
or Enable options on this dialog box to turn
rules on or off.
Show
Previously Unused Labels
This menu item works with labels on a CadReportObject in a duplicated page.
If you turn off a set of labels on the CadReportObject on one page and then duplicate that page, you can use this menu item on the duplicated page to get it to show the labels not used on the original page.
Fix Label
Positions
This menu item creates a position modification for each label so that the
next time you open the report, PC-DMIS won't recalculate label positions.
GraphicsOptions
| None
This menu item hides all labels on the CADReportObject.
GraphicsOptions
| Labels
This menu item shows all labels on the CADReportObject.
Add Page
(applies to Custom Reports only)
This menu item adds a new page to the end of your custom report.
Delete
Page (applies to Custom Reports only)
This menu item deletes that page from your custom report. You must always
have at least one page in your report.