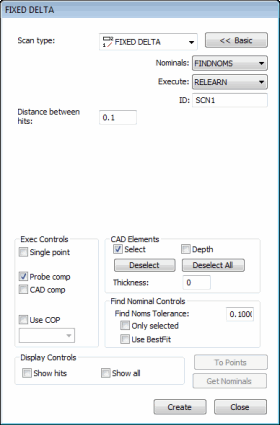

Fixed Delta dialog box

The Insert | Scan | Fixed Distance scan method enables you to reduce the measured data by setting a distance value in the Distance between hits box. PC-DMIS starts from the first hit and reduces the scan by deleting hits that are closer than the distance specified. The reduction of hits happens as data comes from the machine. PC-DMIS only keeps the points that are set apart by more than the specified increments.
If you have specified an increment of 0.5, PC-DMIS only keeps the hits that are at least 0.5 units apart from each other. It discards the rest of the hits from the controller.
To create a fixed distance (delta) scan:
Open the Fixed Delta dialog box.
If you don't want to use the default name, specify a custom name for the scan in the ID box.
In the Distance between hits box, type the distance that the probe needs to move before PC-DMIS takes a hit. This is the 3D distance between points.
If you type 5, and your unit of measurement is millimeters, the probe has to move at least 5 mm from the last point before PC-DMIS accepts a hit from the controller.
If you're using a CAD model, type a find nominals tolerance in the Find Nominal Controls area. This defines how far away the actual ball center point can be from the nominal CAD location.
Set any other dialog box options as needed.
Click Create. PC-DMIS inserts the basic scan.
Execute your measurement routine. When PC-DMIS executes the scan, the Execution Options dialog box appears. PC-DMIS waits for data to come from the controller.
Manually drag the probe over the surface you want to scan. PC-DMIS accepts hits from the controller that are separated by any distance greater than the distance you defined in the Distance between hits box.
See the "Common Functions of the Scan Dialog Box" topic for information on the other controls in this dialog box.