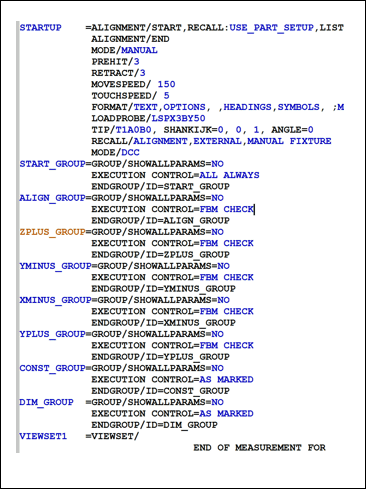
To provide a collision-free path for measurement, you need to create the measurement routine with Feature Based Measurement (FBM) concepts. FBM is tightly coupled with the GROUP command. The following is an example of a measurement routine where all measured features and dimensions are placed in groups. (Collapsed groups are shown.)

Example of a measurement routine with groups
Group Command Concepts
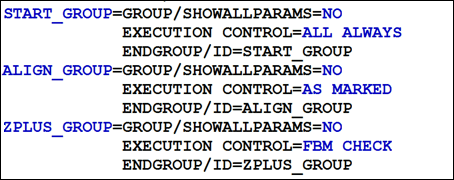
PC-DMIS extends the GROUP command when you use the command with FBM.

Example of group commands with FBM
The group header displays an additional choice for execution control. Three options are available in the group control:
ALL ALWAYS - PC-DMIS always marks and executes the entire group and its nested subgroups. There may be several situations where the PC-DMIS application programmer would like to always measure certain features.
AS MARKED - The FBM marking method marks the commands in the measurement routine to measure the selected dimensions. All parent features of every dimension are selected, and any required alignment is marked. If you select AS MARKED, PC-DMIS executes all of the marked features. PC-DMIS skips all of the non-marked commands.
FBM CHECK - At the time of execution, PC-DMIS determines if a feature or dimension is marked in the group. If it finds a marked feature or dimension, it executes the entire group according to its marking status. If PC-DMIS determines that no feature or dimension is marked, it skips the entire group.
For information about how to insert groups into a PC-DMIS measurement routine, see "Inserting Groups".
FBM Concepts
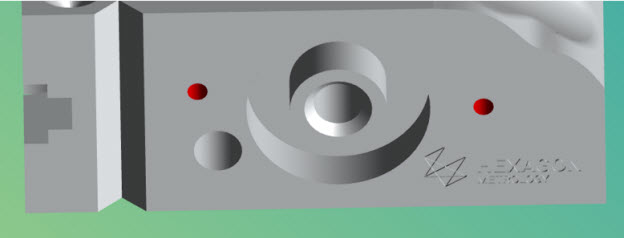
Each group can measure features on a given face of a part. There may be move points at the beginning of the group. These move points position the tip on top of the face of interest. You can now use any method in PC-DMIS to measure all of the features on this face. When all measurements are completed, the probe moves back to a position from where it can safely move to any other group.
You can compare the move points at the start and end of the group to that of a car entering and exiting a highway. PC-DMIS enters the group and positions the tip to measure a feature on that face. After PC-DMIS completes the measurement, it positions the tip to move to any other face or tool changer if required.
You can use nested groups in cases where additional move points may be required to measure features without collision. For example:

Example of nested groups
To measure the planes on the V groove, you would create a nested group. This nested group has an entry and exit move point in front of the V groove. This ensures collision-free measurement of the planes in the groove.
You can create dimensions in the group where they are measured, or create them in a separate group. You can also group dimensions according to an operation, cell, or manufacturing tool. This may help you select a complete group of dimensions to measure any operation.
If your measurement routine requires a tip or tool change, then you need to define this within the group. Each group should ensure that the required probe and tip are selected.
If you assigned datum feature reference letters to the datum features, you need to do this within the group that measures the features.
Alignment Concepts
Carefully consider how you create alignments. For FBM, you select a dimension to report, and FBM marks the related features.
FBM marks all of the required features to create the appropriate alignment. In PC-DMIS, you can base alignments on the recall of a previous alignment. In those cases, FBM also looks at those alignment dependencies and marks everything required to create the recalled alignment.
If an alignment constrains all 6 Degrees of Freedom (DOF), we recommend that you recall the STARTUP alignment rather than the previous one. This breaks the dependency chain, and PC-DMIS only measures those features.
Measurement Routine Variables
PC-DMIS may use variables to measure a family of parts. FBM supports variables.
It is recommended that you define and use the variable that is in the same group in which you want to measure the feature.
If you need variables (character strings or numbers) for any reason, you may want to define them in a START_GROUP command at the beginning of the measurement routine. Mark this group as EXECUTION CONTROL=ALL ALWAYS. You can place anything that must be executed (such as non-motion commands, tracefields, and generating strings for output file names) in the START_GROUP command.
Commands Outside of Groups
You can create commands outside of a group. Any command that exists outside of all groups (that is, it does not belong to a group) has a "global scope". PC-DMIS always executes these commands according to their marked status.