Step 1 - Select the ACR1 Probe Changer
To select the ACR1 Probe Changer:
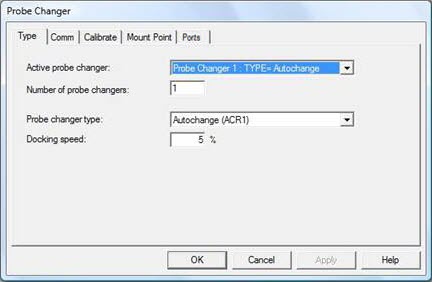
In the Probe Changer dialog box (Edit | Preferences | Probe Changer), select the Type tab.
In the Probe changer type list, select Autochange (ACR1):
Probe Changer dialog box - Type tab
To make this probe changer active and load the settings that are relevant to this probe changer, click Apply. Other tabs become visible after you click Apply.
In the Active probe changer list, select the item that represents the probe changer you are defining. If this is the first probe changer, it appears as Probe Changer 1 : TYPE=None.
In the Number of probe changers box, type the number of different types of probe changers.
In the Docking speed box, type a value. A value between 15-20% is appropriate for this machine configuration. You can adjust this value at any time to speed up or slow down the system.
To avoid equipment damage due to excessive docking speed, increase the Docking speed value gradually.
Click Apply to apply any changes made for this probe changer, and then click OK to close the dialog box.
For details on controller configuration settings, see the documentation that came with your controller.
In the next step, you define the communications port.