Step 11 - Move the Probe Head into Port 4
For the ACR3 Probe Changer, you must follow additional procedures after the DCC measurement is done. This process includes steps to visually align the probe changer through a sight hole.
The prompt for moving the probe head is:
Move the ACR3 so that port 4 is directly behind the autojoint on the probe head.
Slowly move the probe head directly back into the docked position in port 4.
Try to move only along the one axis if possible.
When in position, Click OK
Prompt for moving the probe head into port 4
The prompt for aligning the probe changer through a sight hole is:
Slowly move the probe head along the direction of + or - ACR3 travel as needed until the alignment circle is centered in the alignment window above port 1.
For more information about the alignment circle and alignment window please refer to the ACR3 manual.
When in position, click OK
Prompt for aligning the probe changer
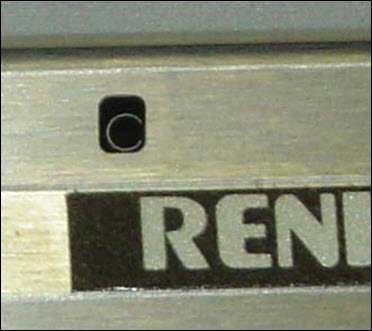
Use your machine's jog box to slowly move the probe changer to the left or right until the square sight hole aligns with the round hole underneath, as shown below:
View of the visual alignment of the probe changer
Once this is done, click OK at the last prompt, as shown below:
Move the probe head clear of the ACR3 then click OK to complete this procedure.
Prompt for moving the probe head clear of the ACR3
The ACR3 calibration is now complete.
Move the probe out and away from the probe changer's port 4 position. Return the probe changer to its right-most side of travel.
In the next step, you review the calibration results.