Step 5 - Take the First Manual Hit
When you start the calibration process for the ACR3 Probe Changer, a series of message boxes prompt you to record two positions and measure two manual hits. Three are required to fully define the orientation of this probe changer in the machine’s XY plane.
The probe changer MUST BE ALIGNED parallel to either the X or Y axis. The manual hits locates the probe changer in the machine space. Follow the prompts and take the needed hits as shown in the pictures for each hit.
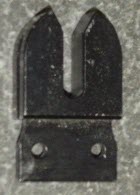
Renishaw provides a setting gauge with the probe changer. Take the first manual hit on the top face of the setting gauge that is inserted into port 1. Use the setting gauge to take hits on port 1 without having to use the probe body.
Setting gauge
The prompt for the first manual hit on the top face is:
Unlock the quick connect joint and remove the probe assembly.
After the probe is removed, use the jog box to move the autojoint above the central port of the setting gauge in port 1.
Slowly lower the probe head so that the autojoint just contacts the top face of the setting gauge which may be used as a feeler gauge as needed. Be careful not to move the position of the ACR3 during this process.
When in position, click OK.
Prompt for the first manual hit
Use your machine's jog box to position the Autojoint directly on the top face of the setting gauge, as shown below:

Autojoint positioned directly on top of setting gauge
When you are ready to take the first measurement, click OK with the probe in position.
In the next step, you take the second manual hit.