Step 4 - Prepare for Calibration
To begin the calibration process for the SCP600 Probe Changer:
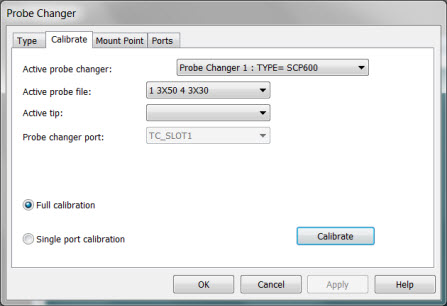
Select the Calibrate tab in the Probe Changer dialog box (Edit | Preferences | Probe Changer):
Probe Changer dialog box - Calibrate tab
In the Active probe changer list, select Probe Changer 1: TYPE=SCP600.
In the Active tip list, select the tip ID to use for calibration. This is usually T1A0B0.
Click the Calibrate button.
Once you click Calibrate, the following message box appears:
Open the lid for port 1 and insert the stylus tool so that the lid remains open.
Remove any probe that may currently be in the port.
Click OK when ready.
To open the lid or lids, push them all the way back and insert a metallic pin (called a stylus wrench) into the hole in the top of the port near the back right corner. This hole is located to the side of the spring on the right when facing the rack.
With the lid or lids open, remove any modules or styli by sliding them forward and out of the ports.
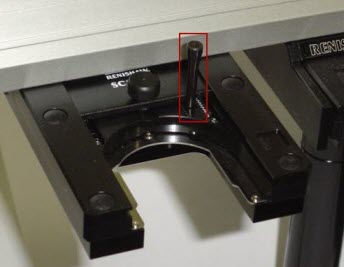
SCP600 Probe Changer showing an empty port held open by the stylus wrench
When you are ready to take the first measurement, click OK.
In the next step, you take the first manual hit.