You can also perform an automatic calibration of the active tip by following this procedure:
Access the Edit window and place it into Command mode by clicking the Command Mode button from the Edit Window toolbar.
From the Settings toolbar, select the tip you want to calibrate. A new TIP command appears in the Edit window.
PC-DMIS requires a measurement of your calibration sphere in order to do this type of calibration. Create or insert a measured or auto sphere feature of the calibration tool to use in the calibration process. This sphere feature must appear sometime after the TIP command in the Edit window.
On any line following the sphere feature you'll be using, access the Insert | Calibrate | Single Tip menu option.
PC-DMIS inserts a CALIBRATE ACTIVE TIP WITH FEAT_ID command block into the Edit window. Note that this command does not communicate at all with the actual machine controller but instead sends data to the probe file.
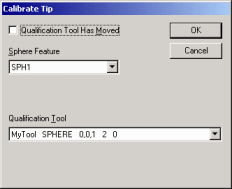
Click anywhere on this command block, and press F9. The Calibrate Tip dialog box appears.

Calibrate Tip dialog box
Select the sphere feature to be measured by the selected tip from the Sphere Feature list.
Select the desired calibration tool from the Qualification Tool list.
If the calibration tool has moved since your last calibration, mark the Qualification tools has moved check box.
Click OK to update the calibration command block with your changes. For example, this example command block shows that the calibration tool is named MyTool, and that the sphere feature to use for this calibration is SPH1.
CALIBRATE ACTIVE TIP WITH FEAT_ID=SPH1, QUALTOOL_ID=MyTool, MOVED=NO |
||||
AXIS |
THEO |
MEAS |
DEV |
STD DEV |
X |
0.0000 |
8.0080 |
8.0080 |
|
Y |
0.0000 |
1.0000 |
1.0000 |
|
Z |
0.0000 |
0.9500 |
0.9500 |
|
DIAM |
2.0000 |
1.0000 |
1.0000 |
0.0000 |
Mark this command block, and execute the measurement routine. PC-DMIS calibrates the active tip when it reaches this command block.