Start and End Angles
For a circular feature, the different Start
Angle and End Angle boxes define where
PC-DMIS probes the feature. For many situations, the default values are
sufficient, but there may be times when you need to measure a circular
feature that is partially obstructed by another feature or otherwise only
partially available for probing. Enter the start and end angles in a counter-clockwise
manner.
If you measure a hole with six hits and a Start Angle of 0 and an End
Angle of 360, it looks something like this:
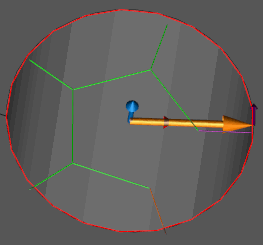
Notice that the Start Angle
and the End Angle are the same: 0 and 360.
Also, the six points making up the circle feature are equally distributed
between the two angles. In this case, each point is taken at 60 degree
intervals with the last point taken at 300 degrees.
However, if you change the Start
Angle to 45 (purple arrow) and the End Angle
to 270 (orange arrow), those values limit the hits to a certain portion
of the circular feature:
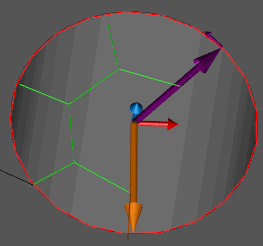
Start and End Angle Boxes
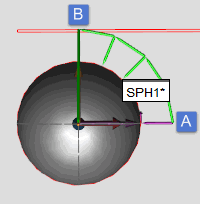
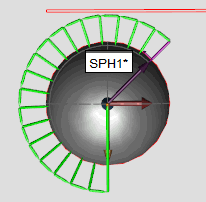
Start Angle and End
Angle boxes - These boxes let you change the default starting and
ending angles on the feature. This is a user-supplied angle in decimal
degrees. The starting and ending angles are relative to the values in
the IJK Angle Vector boxes. If you rotate the
view of the feature so that you look down its center, PC-DMIS spaces the
desired number of hits beginning at the Start Angle
in a counterclockwise direction around the centerline until it reaches
the End Angle.
Consider this example: 


These boxes are only available
for Circle, Cylinder, Ellipse, Cone, and Sphere Auto features.
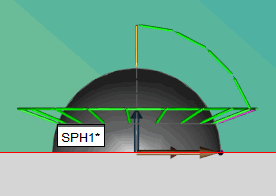
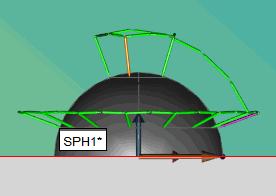
Start Angle 2 and End
Angle 2 boxes - The Start Angle 2 and
End Angle 2 boxes let you determine the secondary
starting and ending angle on a sphere feature. This angle is in decimal
degrees. The secondary angle, if looking at a side view of a sphere, starts
at the sphere's equator and then moves towards the top pole as the angle
increases to 90 degrees and then back down to the equator on the opposite
side of the sphere at 180 degrees. These angles allow you to place the
hits in an area where the probe can reach them without obstruction.
Consider this example: 


The Start
Angle 2 and End Angle 2 boxes are only
available for Sphere Auto features.
2 Degree Buffer Offset
When you generate an arc using one of the circular
Auto features (Circle, Cylinder, Cone, Sphere, or Round Slot), PC-DMIS
offsets the start and end angles each by two degrees. This way arcs retrieved
from the CAD aren't probed on their starting and ending angles, possibly
catching a corner. This shouldn't be an issue in most cases unless you
are attempting to generate a small arc of only a few degrees. For example,
if you want to generate a four degree arc of an Auto Circle,
you need to type in an eight degree arc parameter in the Start
Angle and End Angle boxes, knowing that
PC-DMIS shortens the arc by two degrees on each angle.


