Before you can use a datum reference, you must define it in your measurement routine. You can do this with the Datum Definition command (DATDEF). To define a datum reference and create this command, from the menu, select Insert | Dimension | Datum Definition.
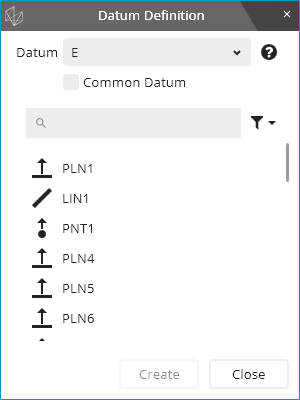
The Datum Definition dialog box appears:

In the Datum box, type or select the datum name.
From the list of datum features, select one or more datum features.
If you select one feature, the datum reference represents a single datum. After you select that feature, PC-DMIS filters the feature list so that it only shows other features with the same characteristics. For example, if you select a circle with a diameter of 25 mm, it filters the list by other circles of that same diameter. This makes it easier for you to select additional, similar features so that your datum reference represents a datum pattern.
Click Create.
As needed, continue to use the dialog box to create additional datums and common datums.
The Datum Definition command's Edit window syntax in Command mode might look like this:
DATDEF/A,FEATURES=PLN2,,
Datum - This box defines the name of the datum reference. It is typically a single letter such as E or a sequence of a few letters such as BG.
Common Datum - This check box lets you define a common datum. If you mark this check box, the feature list doesn't show features anymore; instead, it shows datums you have already defined, and the features associated with the datums.

Datum Definitions dialog box with Common Datum check box selected
For example, to define the common datum A-B, first, define datum A, then, define datum B then select the Common Datum check box. From the list of available datums, select datum A and then datum B to define the common datum A-B.
If you use a common datum, the Datum Definition command's Edit window syntax in Command mode might look like this:
DATDEF/A-B,FEATURES=DATUM_A,PLN1,