 Cancel - This option cancels the execution of
the measurement routine.
Cancel - This option cancels the execution of
the measurement routine.In Sequential Execution mode, when the measurement routine measures and calculates a feature, it does not proceed with the execution until it finishes calculating the current feature. This execution mode allows you to have concrete information about the problem feature when an error message does appear. In addition, execution stops when a message appears. This may help avoid collisions with the part. Sequential Execution mode is slower than the default (asynchronous execution) mode, but it allows you to monitor errors as they occur.
Generally, you should use this mode when executing a measurement routine for the first time, or when you want to test the machine's movements, laser parameters, or feature calculations.
If an error occurs during Sequential Execution mode, you have the following options in the Execution dialog box:
Cancel - This option cancels the execution of
the measurement routine.
 Skip - This option resumes the execution of
the measurement routine from the next feature. The skipped feature command
turns red in the Edit window.
Skip - This option resumes the execution of
the measurement routine from the next feature. The skipped feature command
turns red in the Edit window.
 Try Again - This option retries the execution.
It begins at the failed feature.
Try Again - This option retries the execution.
It begins at the failed feature.
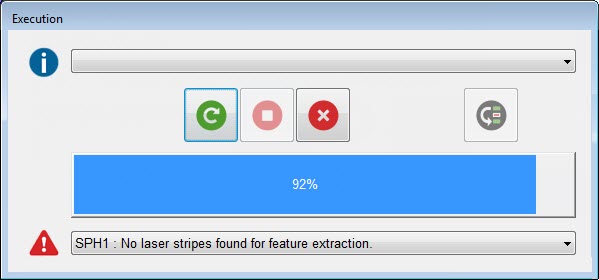
Execution dialog box
Enabling Sequential Execution Mode
To enable Sequential Execution mode, select File | Execute | Sequential Execution or, from the Edit Window toolbar, click the Sequential Execution icon.

Sequential Execution icon on the Edit window toolbar
The software shows this icon in a pressed state when in Sequential Execution mode. PC-DMIS only stays in Sequential Execution mode for the current execution. Afterward, it reverts to the default execution mode.
About the On Error Command
The On Error command does not work with Sequential Execution mode. PC-DMIS ignores any On Error command that it encounters. For detailed information on the On Error command, see the "Handling Laser Sensor Errors with On Error Command" topic.