The steps below describe how to use the Zeiss Eagle Eye 2 with the Zeiss I++ DME server.
Set up the PC-DMIS I++ client. For details, see "I++ DME Client Interface" in the MIIM documentation.
The qualification of the sensor is done inside the I++ DME server.
Use the ZeissWrist entry to enable the wrist in PC-DMIS. For details, see "ZeissWrist" in the "Option" section of the PC-DMIS Settings Editor documentation.
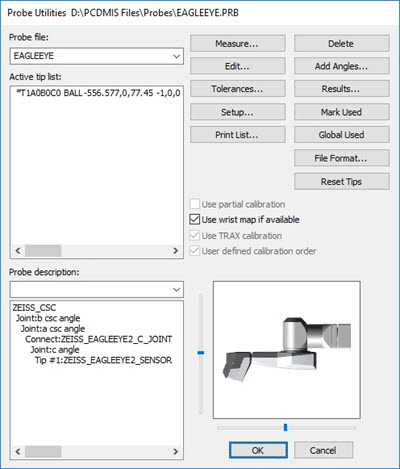
Define the probe assembly.
Probe Utilities dialog box
Select the Use wrist map if available check box.
Select the tip from the Active tip list and then click Edit to open the Edit Probe Data dialog box.
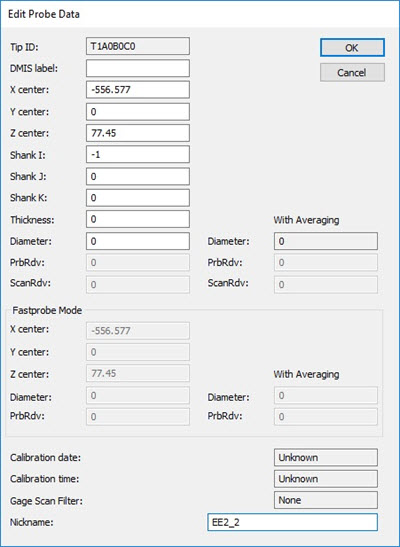
Edit Probe Data dialog box
Enter a name in the Nickname box for the A0B0C0 tip that corresponds to the probe name given in the I++ DME Server for the EagleEye probe.
Set up the probe orientation:
Open the Setup Options dialog box (Edit | Preferences | Setup).
Select the Part/Machine tab.
Click the Probe Head Orientation button to open the Probe Head Wrist Angle Configuration dialog box.
In the CMM1 area, set these two options:
Select the YMINUS option from the wrist's A0B0 position points in this direction list.
Select the XMINUS option from the The wrist's A90B180 position points in this direction list.
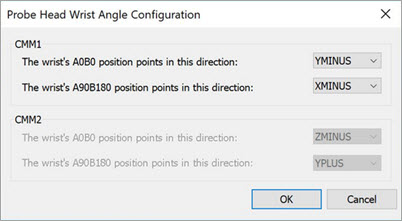
Probe Head Wrist Angle Configuration dialog box
Differences between the Zeiss Eagle Eye 2 and HP-L-10.6
PC-DMIS does not use the Laser Sensor tab in the Setup Options dialog box.
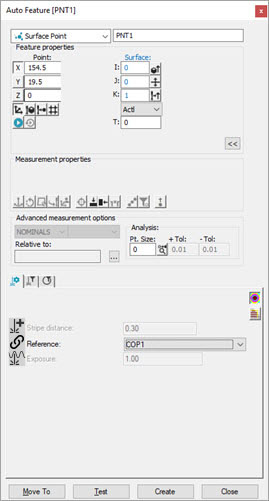
Changes to the Laser Scan Properties toolbox tab in the Auto Feature dialog box are:
For the Eagle Eye 2 measurement, the software hides the Zoom and Gain properties and adds the Exposure and Stripe distance properties.
Stripe distance is the distance between the laser stripes along the path line. Typically, you should use a value between 0.3 and 0.5, inclusive.
The default value for the Exposure setting is 1.0. The valid values are 0.01 to 20, inclusive.
Changes to the Laser Scan Properties toolbox tab on the Scan Feature dialog box are:
For the Eagle Eye 2 measurement, the software hides the Zoom and Gain properties and adds the Exposure and Stripe distance properties. The Scan Feature dialog box settings are the same as the settings described above for the Auto Feature dialog box.