Description of performing a continuous scan with the MI.Probe:
In the example below, the part is aligned with the CAD model and the alignment features were measured.
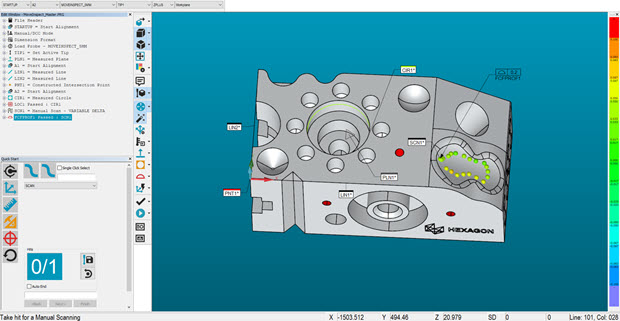
Example of an MI.Probe continuous scan measurement routine
The Find nominals from CAD was turned on from the Probe Mode toolbar (View | Toolbars | Probe Mode) with the Features Use Dimension Colors enabled.
For details on the Find nominals from CAD option, see "Probe Mode Toolbar" in the PC-DMIS Core documentation.
For details on the Features Use Dimension Colors option, see "Features Use Dimension Colors" in the PC-DMIS Core documentation.
A contact scan was selected from the QuickStart window.
Continuous scanning was enabled from the MI.Probe and a manual scan was measured. The measured points are colored based on their deviations from the CAD model.