Faro Calibration Procedure

To correctly calibrate your probe using a Faro arm, follow this procedure:

  1. Access the Probe Calibration Utilities dialog box.

  2. From the Calibration Method area, select the appropriate calibration method.

  3. Select any useful check boxes.

  4. Click the Measure button to begin the calibration process. PC-DMIS displays some visual aids to assist you in calibrating the Faro arm.

  5. Follow any on-screen instructions (including instructions that may appear in the dialog box's status area).

  6. If you’re using the one inch sphere method, take the following hits on the spherical tool, using this diagram and any on-screen aids to assist you:

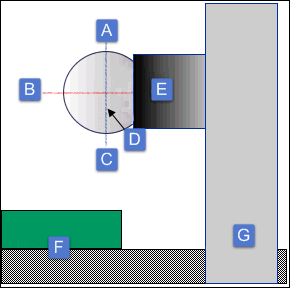
Side view of spherical tool and Faro magnet and clamp

A - West

B - North pole (red line)

C - East

D - Equator of the spherical tool (blue line)

E - Side view of Faro magnet showing spherical tool attached

F - Side view of the part on the table

G - Side view of the clamp attached to the table


  1. If you’re using the hole calibration technique, PC-DMIS asks you to take these hits:

  1. Click OK when you finish calibrating.