Starting with PC-DMIS 2019 R2, PC-DMIS no longer supports the Perceptron laser sensor. While you may still be able to install PC-DMIS 2019 R2 and later, PC-DMIS displays an error if you attempt to run measurement routines that use the Perceptron scanner. For additional information, please contact Technical Support.
To communicate with the Perceptron controller box, you need to configure your dedicated NIC by following these steps:
Click the Start button and select Control Panel to open the Control Panel.
Double-click the Network Connections icon to view the current network connections.
From the list of LAN or High Speed-Internet, double-click on the name of the NIC connected to the Perceptron controller box.
Click Properties on the General tab.
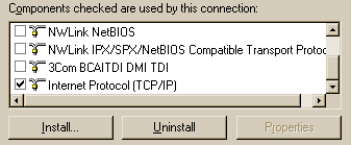
Clear all check boxes except Internet Protocol (TCP/IP) so that the Internet Protocol (TCP/IP) item is the only selected item.
Select the text (not the check box) to highlight Internet Protocol.
Select Properties.
On the General tab of the Internet Protocol (TCP/IP) Properties dialog box, select the option labeled Use the following IP address. Type the following values as shown in the image:
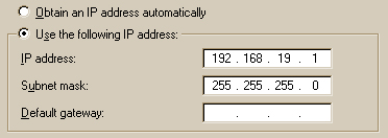
IP address: 192.168.19.1
Subnet mask: 255.255.255.0
Click Advanced to open the Advanced TCP/IP Setting dialog box.
From the Advanced TCP/IP Settings dialog box, select the WINS tab.
Select the Disable NetBIOS over TCP/IP option in the NetBIOS setting area.
Click OK on the Advanced TCP/IP Settings dialog box, click OK on the Internet Protocol (TCP/IP) Properties dialog box, and then click OK on the <dedicated NIC> Properties dialog box.