The Vision tab also supports the ability to display an overlay image of the machine's lamp configuration. To enable this image overlay, click the Illumination Overlay icon from the Vision tab.
This overlay corresponds to the lamp configuration image displayed in the Illumination tab of the Probe Toolbox. Clicking on different areas of this image overlay allows you perform some functions that are also available on the Illumination tab.
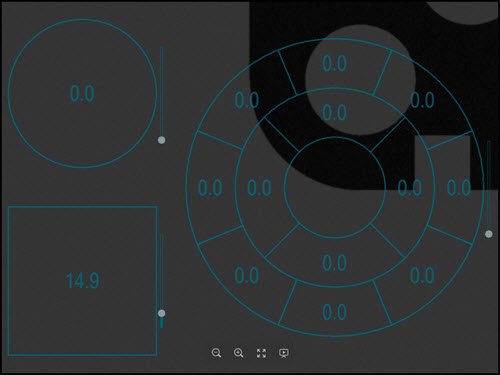
The graphical illumination overlay looks something like what appears in the example image below. Your overlay may look different depending on the type of illumination your machine supports:
Example Graphical Overlay of the ring lamp in the Vision tab
The overlay represents the different bulbs and the light intensity for each of those bulbs. You can select which bulbs you wish to control by clicking on them. Click and drag the mouse cursor over the bulbs to select multiple bulbs or hold the Ctrl key and click them individually.
Toggle the On or Off state of the selected bulbs with a right click.
To adjust the intensity of the selected bulbs, use the mouse scroll wheel. Hold the Ctrl key down while you scroll to adjust the intensity by larger steps. Alternatively, click and drag the slider handle to the right of each lamp in the overlay; or hover over the slider and use the mouse wheel to adjust the intensity.