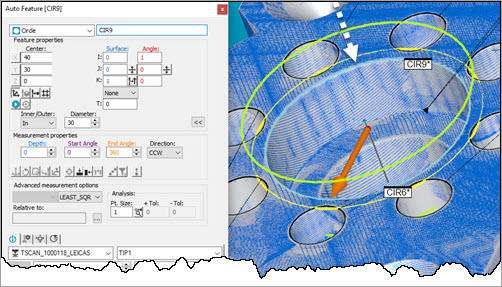
For pointcloud data, if you set the Depth value to 0 (zero), PC-DMIS uses the points on the plane of the circle along the edge. The dotted white arrow points to where this is in the image below.
If you enter a Depth value of 5, for example, PC-DMIS takes the points 5 units below the plane of the circle and then projects them back up to the plane of the circle to solve it. The dotted white arrow points to where this is in the image below.

This may appear confusing if you turn the Show Measured Points button on. This is because PC-DMIS shows the hits at the plane of the circle that the points were projected to instead of at the Depth location. How PC-DMIS shows this is by design. The points you see are actually the same points taken at the Depth location, but they are projected to the plane of the circle. You can test this if you try to create a circle at a depth where no points exist. The test will fail.
Application
As long as the edge of your circle has good definition, you do not need to set a Depth value. It can remain at zero. This is especially true because you need to scan points in a repeatable manner and doing so at a depth is more difficult.
Except in the case of chamfers or extruded holes, you can keep the Depth value set to 0 (zero).
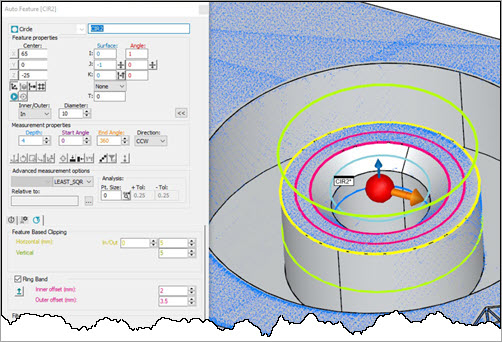
In this example, Depth is set to 4 to take the measurement of the cylinder down and away from the chamfer. The Ringband is used to move the circle away from the chamfer.