Select File | Import | VDAFS to show an Import dialog box.
Select the data type you want to import from the file-type list.
Use the Import dialog box, and navigate to the folder that contains the file to import. Then select the file.
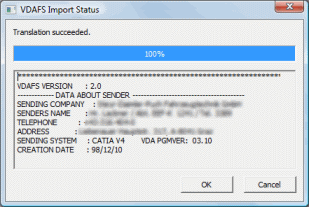
Click Import when you are ready to import the file. PC-DMIS displays the VDAFS Import Status dialog box. This dialog box contains a status bar in the top half and an information box in the bottom half. This information box displays header data contained within the imported VDAFS file.

VDAFS Import Status dialog box
Click OK after PC-DMIS finishes translating the VDAFS file. If the translation fails, the OK button is not available. Click Cancel to decline the addition of the imported file.
A Note on Importing Point Data from PSET (Point Set) Objects
If the .VDA file you are importing contains point data within PSET Objects, PC-DMIS may create a .cad file with fewer CAD entities than what actually appears on the screen.
To get a number of CAD entities equivalent to the number of displayed points on the Graphic Display window, follow this workaround:
Close PC-DMIS.
Start the PC-DMIS Settings Editor.
Expand the ImportSettings section.
Set the ExplodePolylines registry entry to TRUE.
Set the KeepPolylines registry entry to FALSE.
Save your changes to the registry, close PC-DMIS Settings Editor, and restart PC-DMIS.
Import the .vda file again.
For information on how to modify registry entries, see the "Modifying Registry Entries" section.