Reporting toolbar
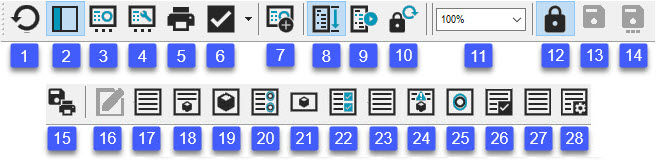
The Report window's Reporting toolbar performs these functions:
 Redraw the Report - Redraws and updates the report
with newly added changes. If you modify the current report template,
label template, or custom report, or your measurement routine changes,
click this icon to have your report redrawn and updated to use the
newly-modified template or new data from your measurement routine.
Redraw the Report - Redraws and updates the report
with newly added changes. If you modify the current report template,
label template, or custom report, or your measurement routine changes,
click this icon to have your report redrawn and updated to use the
newly-modified template or new data from your measurement routine.
 Preview Pane - Opens and closes a pane of
thumbnail images so that you can preview the report. Each image on
the pane corresponds to a page on the report. For more information,
see "Working with
the Preview Pane" in this chapter.
Preview Pane - Opens and closes a pane of
thumbnail images so that you can preview the report. Each image on
the pane corresponds to a page on the report. For more information,
see "Working with
the Preview Pane" in this chapter.
 Template Selection - Displays a dialog box that
allows you to manage your templates and select a template from which
to generate your report output. For more information, see "Applying or Removing
a Report Template".
Template Selection - Displays a dialog box that
allows you to manage your templates and select a template from which
to generate your report output. For more information, see "Applying or Removing
a Report Template".
 Custom Report Selection - Displays a dialog box
that allows you to create a new blank custom report or open an existing
custom report. For more information, see "Creating
Custom Reports".
Custom Report Selection - Displays a dialog box
that allows you to create a new blank custom report or open an existing
custom report. For more information, see "Creating
Custom Reports".
 Print Report - Prints the report based on the
output settings defined for the Report window. For information on
defining your output, see "Setting
Output and Printer Options for the Report Window" in the
"Using
Basic File Options" chapter.
Print Report - Prints the report based on the
output settings defined for the Report window. For information on
defining your output, see "Setting
Output and Printer Options for the Report Window" in the
"Using
Basic File Options" chapter.
 Set this report as the default report - Sets the
current template on the screen as the new default template for your
current measurement routine. PC-DMIS automatically uses the defined
default report template whenever you open your measurement routine
at a later date. Initially, this default report is set to TEXTONLY.RTP.
Set this report as the default report - Sets the
current template on the screen as the new default template for your
current measurement routine. PC-DMIS automatically uses the defined
default report template whenever you open your measurement routine
at a later date. Initially, this default report is set to TEXTONLY.RTP.
The drop down menu next to this icon lets you set a default report without having to load it first. It displays all the saved report layouts.
To set the default report, select the item from this list. PC-DMIS places the check mark next to it to indicate it as the new default report. The current loaded report is indicated by a bold font.

For example, in the above image, the check mark indicates TextOnly.rtp as the default report and CADOnly.rtp as the current loaded report.
If you select No default report then nothing appears in your Report window the next time you load the measurement routine and access the Report window.
Setting a Default Report for All Measurement Routines
If you want to set a default report for all measurement routines, use the PC-DMIS Settings Editor, access the FileMan section, and set the DefaultReportTemplate registry entry to the name of the report template you want to use. For information on registry entries, see the "Modifying Registry Entries" appendix.
 Add Template to Toolbar - Saves the current
report template or custom report as a stored report, and a new stored
report icon
Add Template to Toolbar - Saves the current
report template or custom report as a stored report, and a new stored
report icon  appears on the toolbar with the same name as your template or custom
report to the right of the standard report icons. When you click the
added icon, the Report window automatically uses the saved template
or custom report to display your report.
appears on the toolbar with the same name as your template or custom
report to the right of the standard report icons. When you click the
added icon, the Report window automatically uses the saved template
or custom report to display your report.
 View Report Mode - Generates
the report from the first command to the last command in the measurement
routine, regardless of how PC-DMIS last executed the measurement routine.
View Report Mode - Generates
the report from the first command to the last command in the measurement
routine, regardless of how PC-DMIS last executed the measurement routine.
 Last Execution Report Mode - Shows only those
items executed in the most recent measurement routine execution. It
also shows the commands in the same order in which they were executed.
If commands are executed multiple times due to a loop, it shows those
multiple executions as well.
Last Execution Report Mode - Shows only those
items executed in the most recent measurement routine execution. It
also shows the commands in the same order in which they were executed.
If commands are executed multiple times due to a loop, it shows those
multiple executions as well.
The SaveExecuteList registry entry in the Reporting section of the PC-DMIS Settings Editor determines whether or not this information is retained when you later re-open your measurement routine. By default, this functionality is enabled.
If set to 1, PC-DMIS stores the items reported during your last execution within your measurement routine, so you can easily view them later by selecting the Last Execution Report Mode icon.
If set to 0, PC-DMIS only stores the information temporarily. If you close your measurement routine, PC-DMIS clears out this information.
Partial Executions and Last Execution Report Mode
If you perform partial executions, PC-DMIS appends the reported items to the execute list, potentially causing items to be reported that you don't need reported. You can clear out any partially-executed items from the stored execute list by performing a full execution.
 View Last Saved Report - Restores the saved report
data to what it was at the time it was last locked. This includes
the execute list, temporary modifications made, and the mode that
was last used (either Report Mode or Last Execution Report Mode).
View Last Saved Report - Restores the saved report
data to what it was at the time it was last locked. This includes
the execute list, temporary modifications made, and the mode that
was last used (either Report Mode or Last Execution Report Mode).

Selecting an item from this list sets the report's magnification in
the Report window. The zoom level doesn't affect how the report prints
out, but you may find these options helpful when previewing the report
or determining what template to use.
For small percentages, the pages are laid out side by side horizontally first and then vertically. You can also type in a specific magnification. Using a small percentage makes it easier to rearrange pages. For more information, see "Rearranging Report Pages".
For large percentages, where you are zoomed in on one portion of the report, you can pan the report by either using the scroll bars or by holding Ctrl and dragging on the main page of the report (dragging on a label moves that label). PC-DMIS drags the image in the direction that you pull the mouse.
 Lock the Report - Locks the Report window
so that modifications can't be made to any reports in the window.
In addition, whenever you click this icon, PC-DMIS saves the following:
Lock the Report - Locks the Report window
so that modifications can't be made to any reports in the window.
In addition, whenever you click this icon, PC-DMIS saves the following:
Temporary modifications you made
The execute list
The type of report mode used (Report Mode or Last Execution Report Mode)
You can restore this saved information by clicking the View Last Saved Report icon.
PC-DMIS shows the icon as "pressed" to indicate it is locked:
![]()
Also, with the Report window locked, the mouse pointer changes to this symbol whenever you move the mouse over the window to indicate that the report is in a locked state and cannot be modified:

You can still scroll, print, and view items in the Report window, but you cannot make any modifications to any report until you unlock the window by clicking the icon again.
 Save - Saves the edited custom report with
the same name. PC-DMIS enables this button if you enter edit mode
with Edit report below.
Save - Saves the edited custom report with
the same name. PC-DMIS enables this button if you enter edit mode
with Edit report below.
 Save As - Saves the custom report with a
new name. PC-DMIS enables this button if you enter edit mode with
Edit report below.
Save As - Saves the custom report with a
new name. PC-DMIS enables this button if you enter edit mode with
Edit report below.
 Save/Print the Report - Displays a Report
Output dialog box where you can save the report as a .pdf,
.rtf, or .txt file or send it to the default printer.
Save/Print the Report - Displays a Report
Output dialog box where you can save the report as a .pdf,
.rtf, or .txt file or send it to the default printer. 

 Edit report - If your report is a custom report, this opens
your report in edit mode. If your report is one of these supported
template reports (Text Only, Text and CAD, CAD Only, or CAD-Only Landscape),
the software converts it into a custom report first, and then the
software enters edit mode.
Edit report - If your report is a custom report, this opens
your report in edit mode. If your report is one of these supported
template reports (Text Only, Text and CAD, CAD Only, or CAD-Only Landscape),
the software converts it into a custom report first, and then the
software enters edit mode.
Be aware that template conversion does not support data from loops.
For information on editing custom reports, see "Editing
or Deleting Custom Reports". For information on custom reports
and how to create them, see "Creating
Custom Reports".
 This style of icon, if found to the right of the Default
icon, depicts a modified report template that has been saved to the
toolbar. You can use the Report Template Editor to modify existing
templates or create new ones. For more information, see "Understanding
the Report Template Editor".
This style of icon, if found to the right of the Default
icon, depicts a modified report template that has been saved to the
toolbar. You can use the Report Template Editor to modify existing
templates or create new ones. For more information, see "Understanding
the Report Template Editor".
This style of icon, if found to the right of the Default
icon, depicts a custom report that has been saved to the toolbar.
For information on custom reports, see "Creating
Custom Reports".
Customizing and Restoring the Toolbar
You can add your own templates or custom reports to the toolbar by using the Add Template to Toolbar icon discussed above. When you add a report to the toolbar, a new icon for that report or template appears on the right side of the toolbar. Each new icon you add represents a stored custom report or custom report template.
To remove any report icons from the toolbar, hold down Shift and then drag the icon off of the toolbar. This only removes the template or report from the toolbar; it does not delete the item from the system.
To restore the toolbar to its original toolbar icons, you can do the following:
Close PC-DMIS.
Navigate to the C:\Users\<username>\AppData\Local\Hexagon\PC-DMIS\<version>, where <username> is your Windows user name and <version> is the version of PC-DMIS you are using.
Delete reportingtoolbar.dat.
Restart PC-DMIS.
The Reporting toolbar only resides within the Report window. You need to access the Report window to see it. You cannot select it from the toolbar area of the main PC-DMIS interface.


