Select File | Direct CAD Interfaces | NX to open an Import dialog box.
Navigate to the folder that contains the file you want to import.
Select an NX part (with a .prt extension).
Click Import to import the NX file.
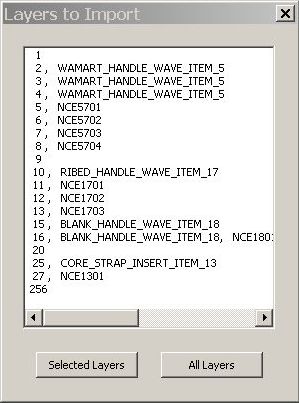
The Layers to Import dialog box then opens. It shows the layers that contain CAD data along with any category name for the layers.
Layers to Import dialog box
To import CAD data only in some layers, select the needed layers, and then click Selected Layers.
To import CAD data from all the layers, click All Layers.
PC-DMIS imports the chosen layers within the .prt file. A progress bar shows the import status.
Use PC-DMIS as usual.
During the import process, you can use the Cancel button to cancel the import. If you already had a CAD model loaded before the import, PC-DMIS retains the previous CAD model.
Time-Out Error
If NX takes too long to connect, it can time out. If this happens, PC-DMIS displays a "Fatal: NX communication error" message. When you click OK on the message, it closes the message. It also shuts down the NX DCI. However, PC-DMIS remains in a functional state. In order to restart the NX DCI, you must first restart PC-DMIS.
You can control the length of time PC-DMIS takes before it times out with the PartLoadTimeout and CommandTimeout registry entries. For more information on these registry entries, see the "Modify the Registry" topic.