Live View Controls
This topic discusses the controls located at the bottom
of the Vision tab.
Live View Freeze:  This button "pauses" the update of
the Live View display. This is useful if you want to keep something on
the screen to analyze or take a screen capture, but you want the measurement
to continue in the background. To restart the Live View update, release
this button.
This button "pauses" the update of
the Live View display. This is useful if you want to keep something on
the screen to analyze or take a screen capture, but you want the measurement
to continue in the background. To restart the Live View update, release
this button.
Move to Previous Target:
 This button moves the Field of View (FOV) to the previous target in a
list of targets.
This button moves the Field of View (FOV) to the previous target in a
list of targets.
Skip Backwards on Target:
 This button moves the FOV part way backward along a target towards the
previous target. This helps you see how an entire feature might be measured
even though the entire feature does not fit inside the FOV.
This button moves the FOV part way backward along a target towards the
previous target. This helps you see how an entire feature might be measured
even though the entire feature does not fit inside the FOV.
Skip Forwards on Target:
 This button moves the FOV part way forward along a target towards the
next target. This helps you see how an entire feature might be measured
even though the entire feature does not fit inside the FOV.
This button moves the FOV part way forward along a target towards the
next target. This helps you see how an entire feature might be measured
even though the entire feature does not fit inside the FOV.
Move to Next Target:  This button moves the FOV to the next target in a list of targets.
Snap to Edge Toggle:  This button causes selected points for feature creation to snap to the
closest point along the nearest edge. If not selected, points will remain
where they are clicked. For more information on this feature, see "Setting Up the Live View".
This button causes selected points for feature creation to snap to the
closest point along the nearest edge. If not selected, points will remain
where they are clicked. For more information on this feature, see "Setting Up the Live View".
Snap to Edge is also used
at execution time for Manual Targets. If this option is on, and you drag
and drop a manual target, PC-DMIS will do an edge detection to snap the
crosshair to the edge.
AutoShutter Toggle:  This button
enables AutoShutter capability to measure features. For more information
on this feature, see "Setting
up the Live View".
This button
enables AutoShutter capability to measure features. For more information
on this feature, see "Setting
up the Live View".
Compass Toggle:  This button causes the AutoCompass to display
an arrow and the distance to move for the next target. For more information
on this feature, see "Setting
up the Live View".
This button causes the AutoCompass to display
an arrow and the distance to move for the next target. For more information
on this feature, see "Setting
up the Live View".
Show Target Toggle:  This button toggles
the display of targets in the Graphic Display window or the Live View.
This is the same functionality as the show target button on the Auto Feature dialog box. This is particularly
useful when you are using the Quick Start window and the Auto
Feature dialog box is not open.
This button toggles
the display of targets in the Graphic Display window or the Live View.
This is the same functionality as the show target button on the Auto Feature dialog box. This is particularly
useful when you are using the Quick Start window and the Auto
Feature dialog box is not open.
Lock Target Toggle:  This button,
when selected, locks the display of targets in the Graphics Display window
or the Live View. If this is locked, you cannot click and drag the target
to a new location on the Vision tab.
This button,
when selected, locks the display of targets in the Graphics Display window
or the Live View. If this is locked, you cannot click and drag the target
to a new location on the Vision tab.
Show Gray Scale Toggle:  This button, when
selected, shows a gray-scale depiction of the Vision
tab. This button only appears when a color camera is used. For black-and-white
or monochrome cameras, this button will not appear.
This button, when
selected, shows a gray-scale depiction of the Vision
tab. This button only appears when a color camera is used. For black-and-white
or monochrome cameras, this button will not appear.
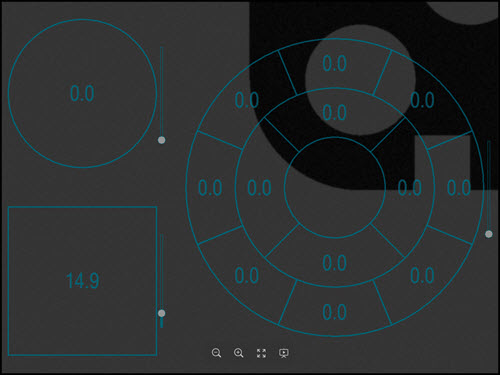
Transparency:  This button, when selected,
 displays
a slider underneath it. You can drag the slider to
set the transparency of the overlays displayed within the Live View. The
transparency dynamically updates as you drag the slider. This is the only
place that you can change the overlay transparency. The default value
is 50%. 0% = fully transparent. 100% = solid.
displays
a slider underneath it. You can drag the slider to
set the transparency of the overlays displayed within the Live View. The
transparency dynamically updates as you drag the slider. This is the only
place that you can change the overlay transparency. The default value
is 50%. 0% = fully transparent. 100% = solid.
Magnification:  This button, when selected, displays
a slider underneath it. You can drag the slider to
set the magnification of the Live View without having to use Magnification
tab on the Probe Toolbox. The magnification dynamically updates as you
drag the slider. For more information on magnification, see "Probe
Toolbox: Magnification tab".
This button, when selected, displays
a slider underneath it. You can drag the slider to
set the magnification of the Live View without having to use Magnification
tab on the Probe Toolbox. The magnification dynamically updates as you
drag the slider. For more information on magnification, see "Probe
Toolbox: Magnification tab".
Gage Overlay:  This button when selected, toggles the display
of the currently selected gage overlay. Select the black down arrow to
display the Gage
Selector toolbar underneath the button, enabling you
to select a different gage type to be displayed. For more information
on gages, see "Probe Toolbox:
Gages tab".
This button when selected, toggles the display
of the currently selected gage overlay. Select the black down arrow to
display the Gage
Selector toolbar underneath the button, enabling you
to select a different gage type to be displayed. For more information
on gages, see "Probe Toolbox:
Gages tab".
Auto Void:  This button, when selected, will perform a void
detection for the currently edited feature. It automatically adds targets
with zero point density at the detected void areas.
This button, when selected, will perform a void
detection for the currently edited feature. It automatically adds targets
with zero point density at the detected void areas.
SensiFocus:  This button executes an automatic "sensible
focus" on the center of the Vision tab.
This button executes an automatic "sensible
focus" on the center of the Vision tab.
On a DCC machine, it automatically moves the
stage and then returns it to the focus position. The parameters used
for this focus do not come from Focus tab of the Probe Toolbox. Instead, they
are based on available data such as pixel size, depth of focus, frame
rate, and so on. The focus target size is fixed and located in the
center of the Vision tab.
On a manual machine, this button is disabled.
SensiLight:  This button performs an on-the-spot automatic
"sensible lighting" adjustment in an attempt to achieve optimal
results. The Illumination tab will quickly be
selected as this automatic adjustment is made. For additional information
on how SensiLight is used as a parameter for edge features, see the SensiLight
description under "Automatic
Hit Target - Edge Parameter Set".
This button performs an on-the-spot automatic
"sensible lighting" adjustment in an attempt to achieve optimal
results. The Illumination tab will quickly be
selected as this automatic adjustment is made. For additional information
on how SensiLight is used as a parameter for edge features, see the SensiLight
description under "Automatic
Hit Target - Edge Parameter Set".
Illumination Overlay:  This
button toggles the display of the Illumintation
Overlay on the Vision tab.
For more information on illumination, see "Probe
Toolbox: Illumination tab".
This
button toggles the display of the Illumintation
Overlay on the Vision tab.
For more information on illumination, see "Probe
Toolbox: Illumination tab".
Laser Toggle:  This button toggles the laser on and off. This
is available for systems with laser probe or laser pointer fitted (such
as TESA VISIO 300 and 500).
This button toggles the laser on and off. This
is available for systems with laser probe or laser pointer fitted (such
as TESA VISIO 300 and 500).