Executing Measurement Routines
With PC-DMIS, you can easily execute an entire measurement
routine or perform partial executions. This topic describes how to perform
both full and partial executions. It also explains how to use the Execution dialog box to execute your measurement
routines and how to resize the dialog box.
When you choose to execute some or all of your measurement
routine by selecting File | Execute or a menu
item from the File | Partial Execution submenu,
the Execution dialog box opens. Also, if you
don't have breakpoints in your measurement routine, PC-DMIS displays a
different layout of the screen display called the "execution layout".
This layout initially hides the Edit window and expands the Graphic Display
window, to show more of the part. It also displays the Probe Readouts
window. You can change what windows appear during execution by pausing
the execution and showing or hiding a window. Subsequent executions use
your updated execution layout.
When execution finishes, the screen layout returns
to the learn time layout. Any window you show or hide during learn time
becomes part of the learn time layout.
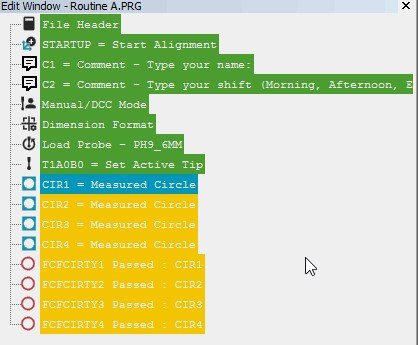
If you execute a measurement routine with breakpoints, PC-DMIS continues to display the Edit window
during execution:
In Command
mode, PC-DMIS highlights the current command to
execute in red.
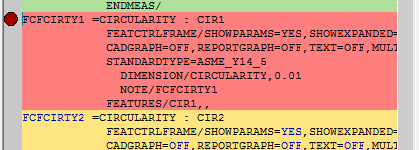
In Summary
mode, PC-DMIS shows a green
highlight in the Edit window for already executed commands. Features
in yellow are about to be executed.
Features undergoing execution are in blue.
Non-executed commands are in orange.
More:
Execute
Execute Feature
Execute From
Execute From Cursor
Execute Block
Execute From Start Points
Mini
Routines
Any
Order Execution
Reset
Execution List
Using the Execution Dialog
Box