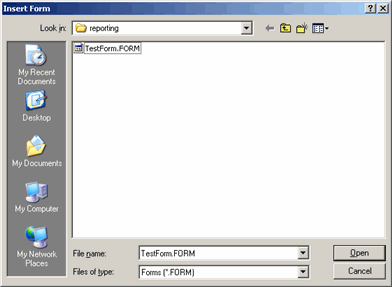
The Insert | Report Command | Form menu item lets you insert a predefined .FORM file into your measurement routine. When you select this menu item, an Insert Form dialog box appears.
Insert Form dialog box
Navigate to the .FORM file, select it, and click Open. PC-DMIS will insert a FORM/FILENAME command similar to the following into the Edit window:
CS1=FORM/FILENAME=C:\PCDMIS40RELEASE\REPORTING\TESTFORM.FORM
PARAM/=
ENDFORM/
FILENAME = This defines the location of the .FORM file to load.
PARAM/ - This lets you send information to the form. For example using a PARAM statement of PARAM/Text1.Text=C1.INPUT will send the value of the comment C1.INPUT and send it to the control.
Alternately, you can type FORM and press TAB to insert the FORM/FILENAME command into the measurement routine, and then manually type the path to load the desired form.
When PC-DMIS executes this command, it will launch the defined form, and then pass any defined parameters to the controls in the form.
Communicating between the FORM and the Measurement Routine
You can pass values to and from a form by using a combination of ASSIGN and PARAM statements. This lets you establish useful two-way communications between the form and the measurement routine.
ASSIGN Statements - You can initialize values for a form's controls through ASSIGN statements. These statements also create variables that can later receive updated values from the form when the form closes.
For example, suppose you have a form that has four unnamed check boxes, like this:
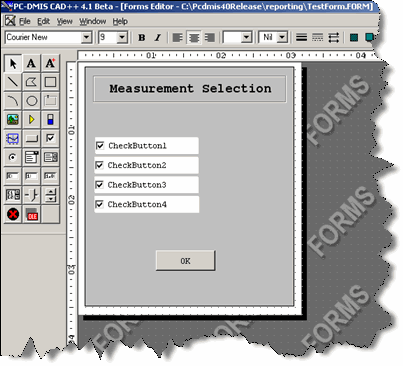
However, you want the measurement routine to give them names and values dynamically. In the Edit window, you can use the ASSIGN statements to name and initialize the check boxes as follows:
ASSIGN/CHECK1VALUE=0
ASSIGN/CHECK1TEXT="Point"
ASSIGN/CHECK2VALUE=1
ASSIGN/CHECK2TEXT="Line"
ASSIGN/CHECK3VALUE=0
ASSIGN/CHECK3TEXT="Circle"
ASSIGN/CHECK4VALUE=1
ASSIGN/CHECK4TEXT="Sphere"
PARAM Statements - Now that you have several variables, you can use the PARAM statements to establish the connection between the variables and the form itself, like this:
CS1=FORM/FILENAME= C:\PCDMIS40RELEASE\REPORTING\TESTFORM.FORM
PARAM/CHECKBUTTON1.VALUE=CHECK1VALUE
PARAM/CHECKBUTTON1.TEXT=CHECK1TEXT
PARAM/CHECKBUTTON2.VALUE=CHECK2VALUE
PARAM/CHECKBUTTON2.TEXT=CHECK2TEXT
PARAM/CHECKBUTTON3.VALUE=CHECK3VALUE
PARAM/CHECKBUTTON3.TEXT=CHECK3TEXT
PARAM/CHECKBUTTON4.VALUE=CHECK4VALUE
PARAM/CHECKBUTTON4.TEXT=CHECK4TEXT
PARAM/=
ENDFORM/
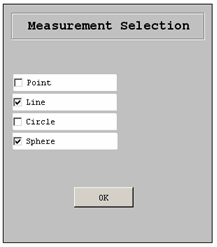
When the form loads, CHECKBUTTON1 is unchecked, and its text label displays "Point"; CHECKBUTTON2 is checked, and its text label is "Line"; CHECKBUTTON3 is unchecked, and its text label is "Circle"; and CHECKBUTTON4 is checked, and its text label is "Sphere", like this:
With the form loaded, you can select or clear the check boxes to something different. When you close the form, the variables that initially set the state of the checked state (CHECK1VALUE, CHECK2VALUE, CHECK3VALUE, and CHECK4VALUE ) now hold the current values of the check boxes.