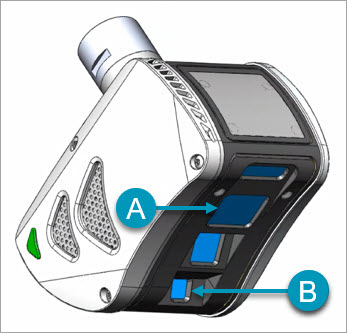

Overview Camera Window - The Overview Camera Window allows you to receive a live video stream of the part from the sensor. This is especially useful when positioning the sensor on large CMMs or in situations where an area or feature of interest is difficult to see.
The Overview Camera Window also enhances the reporting capabilities by allowing you to take snapshots when you execute a measurement routine. You can then import them into your reports. You can also add comments into your measurement routines to visually guide users when you execute measurement routines.
Visual Guide Output - The Visual Guide Output projects an overlay onto the scan area to show the region on your part or CAD model that the HP-L-10.10 sensor will measure. This helps to pinpoint an area or a specific feature of interest when you move the sensor with a jog box or when you perform a measurement in CNC mode.
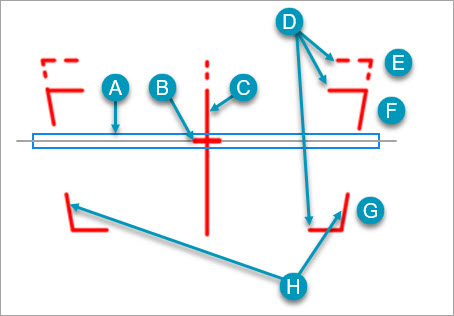
The components of the Visual Guide are:

A - Laser scan line
B - Stand Off Indicator
C - Mid-line
D - Distance Indicators
E - Extended Distance (Stand Off: 90 mm + 60 mm)
F - Far Distance (Stand Off: 90 mm + 30 mm)
G - Near Distance (Stand Off: 90 mm - 30 mm)
H - Max Measuring Width Indicator
The following table shows examples of how you can use the Work Distance Indicator (WDI), the Visual Guide and the position of the laser scan line to determine if you are in range or not.
| Visual Guide Display | Description |
|
The laser sensor is close to the "near" distance. The Work Distance Indicator (WDI) shows a solid green light to indicate that you are in range. |
|
The laser sensor is at the "Stand Off" distance of 90 mm. The Work Distance Indicator (WDI) shows a solid green light to indicate that you are in range. |
|
The laser sensor is close to the "far" distance. The Work Distance Indicator (WDI) shows a solid green light to indicate that you are in range. |
|
The laser sensor is in the "Extended" distance. If the Extended FOV option is disabled, the WDI shows orange to indicate you are out of range. If you enable the Extended FOV option, the WDI switches to green to indicate you are now in range. |
|
The laser sensor is out of range. The WDI shows a solid orange color to indicate that you are out of range. |
|
The laser sensor is out of range. The WDI shows a solid orange color to indicate that you are out of range. |
If you select the On button from the Enable/Disable Visual Guide drop-down toolbar in Live View, the Visual Guide is always displayed.
If you select the Dynamic button from the same toolbar:
The Visual Guide blinks if you do not have the Extended FOV option selected, and you position the laser sensor within the Extended FOV area (dashed lines) of the Visual Guide.
The Visual Guide does not blink if you do not have the Extended FOV option selected, and you position the laser sensor in the Standard FOV area (solid lines) of the Visual Guide.
The Visual Guide blinks if you have the Extended FOV option selected and you position the laser sensor anywhere outside of the Visual Guide, including the Extended FOV area.
The Visual Guide does not blink if you have the Extended FOV option selected and you position the laser sensor anywhere within the Visual Guide, including the Extended FOV area.
More: