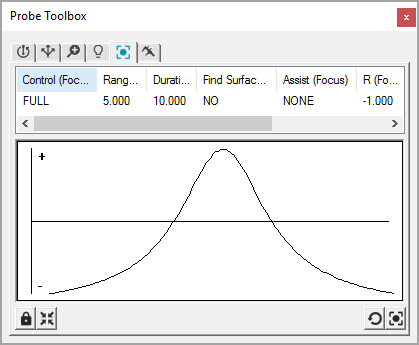

Probe Toolbox showing the Focus tab with bad focus graph results.
A good focus graph would show a rounded curve, like an inverted U.
The Focus tab allows you to perform an immediate focus on the part within the rectangular region defined in the Graphic Display window. The software doesn't generate any measurement routine commands when you use this option.
To perform the focus, use the Vision tab in the window to move or resize the rectangular target over the desired portion of the part, and select one of the Focus buttons. The machine focuses on the specified area of the target, displays the optimum focus position as an overlay on the Vision tab, and displays the focus curve in a graph.
If you select Dual Pass, the initial pass is not shown in the graph, only the second pass is shown.
To get the best focus accuracy and repeatability, focus should be performed at the highest magnification available.
You can set specific feature focus parameters within the Hit Targets tab, and then select the Focus Parameter set. See "Probe Toolbox: Hit Targets tab".
Warnings and errors appear on the Vision tab to indicate the focus success and to provide feedback.
If a warning prefix is given, the focus value was calculated, but the accuracy could be improved by taking the warning text into account. It warns if the speed is too fast, if the focus rectangle is too small, or if the magnification is not high enough.
If an error prefix is given, the focus calculation failed. PC-DMIS Vision restores the focus calculation values to the previous focal position.
More: