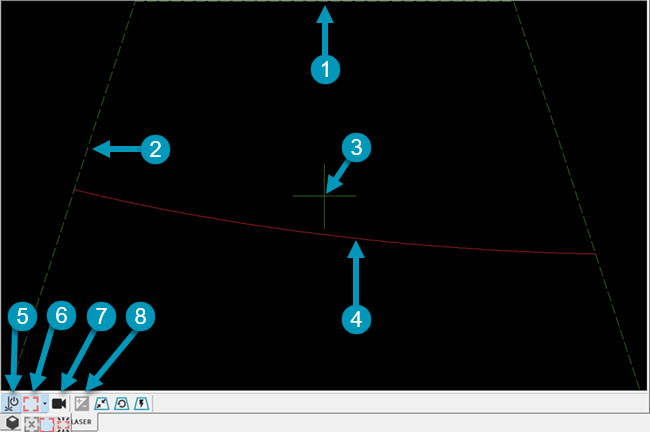
You can use the Live View to display a real-time view of the part to be scanned.
1 & 2 - The border of the Field of View (FOV). Identical to other HP-L type sensors, you can drag and drop these borders to adjust the clipping of the FOV.
3 - Mid-FOV indicator.
4 - Live display of the laser line.
5 - Laser ON/OFF button.
6 - Enable/Disable Visual Guide button.
Click the arrow button to show a drop-down toolbar with these options:
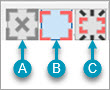
A - Off button: Click this button to turn the Visual Guide off.
B - On button: Click this button to place the Visual Guide in Standard mode where it stays on.
C - Dynamic button: Click this button to place the Visual Guide in Dynamic mode. The Visual Guide will flash based on whether you use the Standard or Extended FOV options, and the position of the laser scan line. For details, see the "The Overview Camera (OVC) and the Visual Guide" topic in this documentation.
7 - Enable/Disable button for the Overview Camera (OVC).
8 - Auto Gain button. You can use it to automatically determine the exposure time when you are in the User-defined (UD) acquisition mode.
To turn on Live View, click the Laser
ON/OFF button  from the Live
View toolbar.
from the Live
View toolbar.