Step 2 - Define the Mount Point
The probe changer mount point is the location in front of the probe changer where the machine moves to before it picks up or drops off a probe. You should pick a location that avoids collisions with the probe changer, the part, clamps, or any other object in the workspace.
To define the mount point for your probe changer, follow these steps:
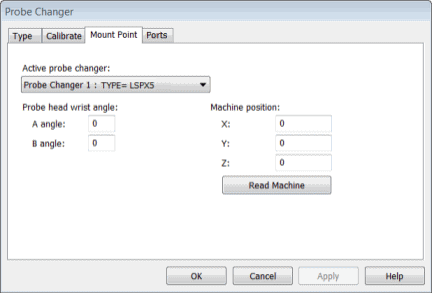
Select the Mount Point tab in the Probe Changer dialog box (Edit | Preferences | Probe Changer):

Probe Changer dialog box - Mount Point tab
In the Active probe changer list, select TYPE=LSPX5.
Alter the probe head wrist angle for both A angle and B angle to 0. (This is a fixed head and cannot be mounted on a wrist.)
Use your jog box to manually move your machine to the desired mount point position.
Click the Read Machine button to populate the X, Y, and Z machine position values with the current position. You can also type these values.
To save your changes, click Apply.
In the next step, you define the ports.