Step 4 - Prepare for Calibration
This step starts the calibration process for the LSPX5 / HR-XS probe changer.
The calibration process does not need any specific probe tip. However, a sturdy probe tip is recommended. Typically, a 5 x 60 mm tip is used.
Calibrate with a straight tip that points down with no cubes or any other joints.
To begin the calibration process, do the following:
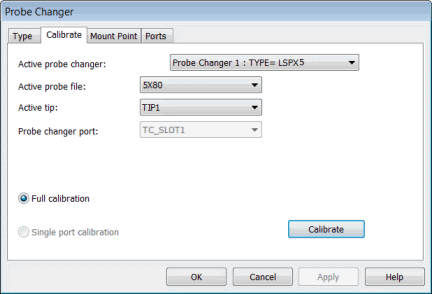
Select the Calibrate tab in the Probe Changer dialog box (Edit | Preferences | Probe Changer):

Probe Changer dialog box - Calibrate tab
In the Active probe changer list, select Probe Changer 1: TYPE=LSPX5.
The entry in the Active probe file list defaults to the current measurement routine setting. If this is not what is to be used for the rack calibration, select the proper probe.
The entry in the Active tip list defaults to the current measurement routine setting. If this is not what is to be used for the rack calibration, select the tip ID to be used for calibration. This is usually TIP1.
To begin, click Calibrate.
In the next step, you take a point with the over-hang of the collet.