Step 9 - Take the AutoJoint Hit on the Datum Sphere
To determine the overall probe length, the system needs one hit on the probe and then another hit on the quick-connect kinematic joint (or AutoJoint). Instructions to remove the probe for this second hit on the datum sphere appear. The instructions for the hit varies if you have an HD wrist. Both sets of instructions are included in this section.
WARNING: At different times throughout this procedure, the machine moves in DCC mode. When this happens, to avoid injury, stay clear of the machine. To avoid hardware damage, run the machine at a slower speed.
Take a manual hit as instructed.
For the AutoJoint:
You can now close the probe changer lids and release the kinematic joint adapter.
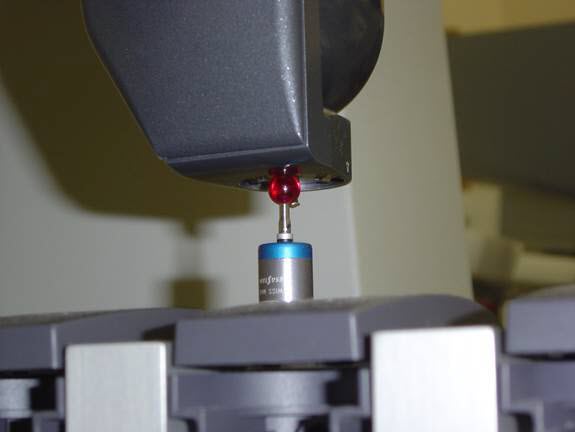
Take 1 hit on the bottom of the kinematic joint with the probe changer datum sphere. Be careful to avoid the small pins and holes and take the hit on the flat area.
After you complete this point the kinematic joint pin will be measured in DCC.
Prompt for hit on datum sphere with AutoJoint
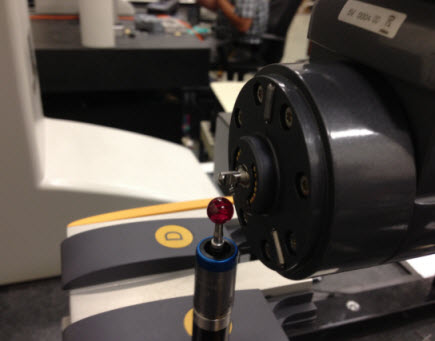
Use your machine's jog box to position the AutoJoint connection above the datum sphere and take a manual hit on the top of the datum sphere
For the HD AutoJoint:
You can now close the probe changer lids and release the HD kinematic joint adapter.
Take 1 hit on the side of the kinematic joint close to the joint pin with the probe changer datum sphere. Be careful to avoid the small pins and holes and take the hit on a flat area.
After you complete this point the HD kinematic joint pin will be measured in DCC.
Prompt for hit on datum sphere with HD AutoJoint
Use your machine's jog box to take a manual hit on the side of the datum sphere using the empty AutoJoint connection
After this manual hit, lift the wrist clear of the datum sphere. The system proceeds under DCC to measure the sphere with the pin that is protruding from the bottom of the AutoJoint.
When this finishes, calibration is complete.
All measurement is now complete. Please reconnect the probe used to measure the ports and then click OK.
In the next step, you measure any defined extensions.