Use the Advanced mode for the WeightComp command to enter complete information about the workpiece's placement, support, and weight distribution.
To use this mode, do the following:
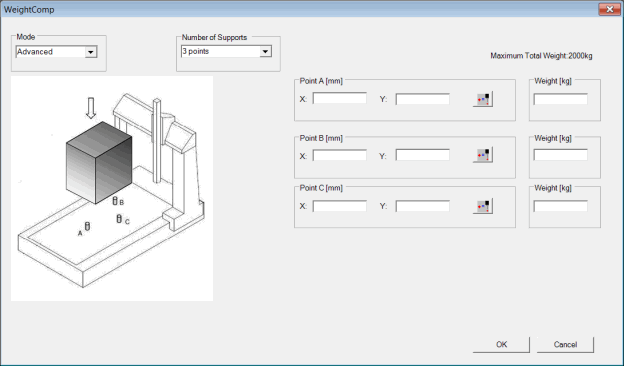
In the Mode list, click Advanced. The following dialog box appears:

WeightComp dialog box - Advanced mode
Complete the items in the dialog box.
Item |
Description |
Number of Supports area |
From the list, select the number of support points on which the workpiece is loaded:
|
Maximum Total Weight [units] |
([units] reflects the current units set up for PC-DMIS: kg or lbs) Maximum total weight read by the controller. |
Point A [units] area Point B [units] area Point C [units] area Point D [units] area (available only when Number of Supports is 4 points) |
([units] reflects the current units set up for PC-DMIS: mm or in) X and Y boxes - Enter the X and Y coordinates of the support points and the weight loaded on each support point. If an X or Y box is blank, an error symbol |
|
To automatically enter the current position in the X and Y boxes, position the CMM and then click this button. |
Weight [units] area |
([units] reflects the current units set up for PC-DMIS: kg or lbs) Type the weight. The sum of the weights for points A, B, C, and D must be less than or equal to the maximum total weight. If the sum is greater than the maximum total weight, a message appears when you click Apply and indicates that the sum needs to be less than the maximum weight: Type the correct weight(s) in the Weight [units] box(es). |
Click OK.
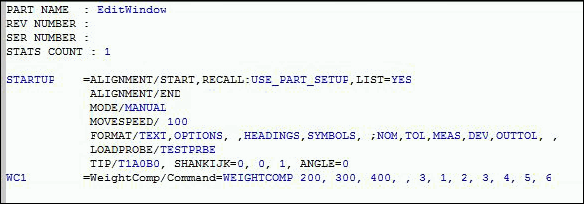
Here is an example of the Edit window for the Advanced mode:

Example of Edit window for Advanced mode