This procedure explains how to insert the Excel Form Report command into the measurement routine.
Create a template with an .xlsx extension in Microsoft Excel. (You can create a template on any computer. You do not need to install Microsoft Excel on a computer that is connected to a CMM.)
Copy the template file (.xlsx) into the following folder:
C:\Users\Public\Documents\Hexagon\PC-DMIS\<version>\ExcelFormReport\Templates
where <version> is the PC-DMIS version.
All the templates must be stored in this folder. PC-DMIS provides some default templates. You must ensure that the templates' headers, footers, fonts, and format conform to your organization's requirement.
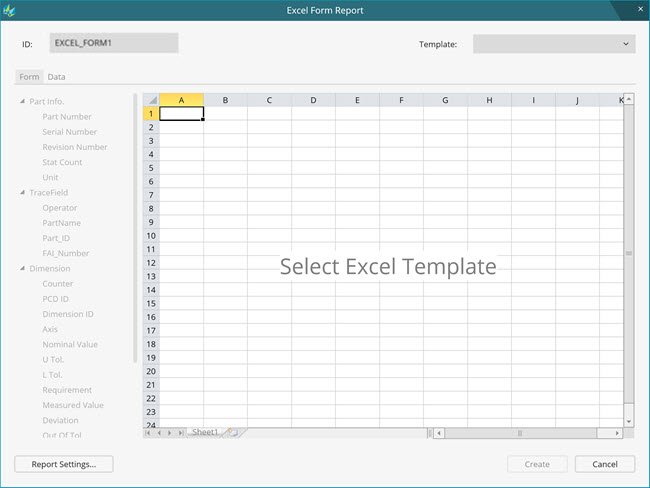
To insert the Excel Form Report command, select Insert | Modules | Excel Form Report to open the Excel Form Report dialog box. You can also type in the Edit window.
Excel Form Report dialog box - Form tab
From the Excel Form Report dialog box, in the ID box, type the new ID, or keep the default one.
From the Template list, select the template. The list displays all the templates stored in the Templates folder. Refer to step 2.
PC-DMIS displays the template in the view area. If the template contains a .layout.xml file, the view area displays the template's data stored in the .layout.xml file. The .layout.xml file generates for each template after you associate the fields with cells and save the command. The file name is <form name>.layout.xml, where <form name> is the name of the template.
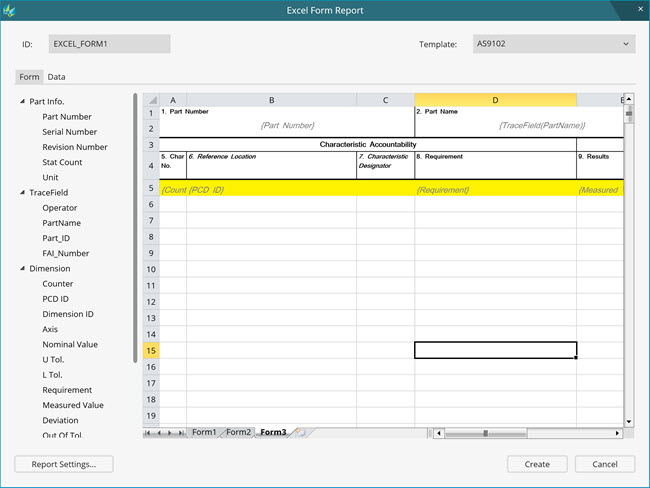
If you select AS9102 (a default template that is provided with PC-DMIS), and the template contains the AS9102.layout.xml file, then the view area shows something like this:
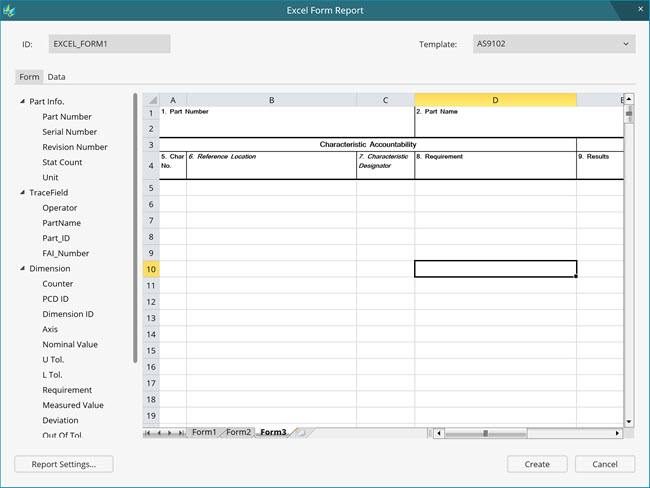
If you select AS9102, and the AS9102.layout.xml file is not available, then the view area shows something like this:
If the .layout.xml file exists, you do not have to configure the template unless you want to edit it. From the Excel Form Report dialog box, click Create to insert the command into the Edit window.
To configure the template, you need to fill the template with header and data fields. You can do it in either of these two ways:
From the left side of the view area, you can use the Part Info. and TraceField groups to fill the header cells of the template. Drag a field from those groups on the cell where it fits (for example, drag Part Number into the Part Number cell).
From the left side of the view area, you can use the Dimension and Custom Fields groups to fill the column or row of the template. Drag a field from those groups on the cell where it fits (for example, drag Counter into the Char No. cell).
Right-click on the cell where you want to associate the field, navigate to the required field, and select it.
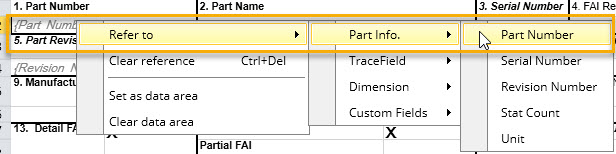
Example of Part Number cell association with the Part Number field
If the template has multiple worksheets, select the tab in the view area and associate the data as defined in step 6.
To clear the association of data in a single cell, select the cell and press Ctrl+Delete. You can also right-click on the cell and select Clear reference. To clear the associations of data in multiple cells, select the area of cells, and press Ctrl+Delete.
After you associate the fields in rows or columns, select all of the associated data fields, right-click on them, and select Set as data area. This sets the data area and highlights the area with a yellow background. The data area defines the collection of data fields that needs to be copied for every dimension to fill the template.
The data area (row or column) fills with data from the first dimension after you execute a measurement routine.
To clear the data area, select the data area, right-click, and select Clear data area. To modify data area, select new cells and redefine it.
To insert the Excel Form Report command, in the Excel Form Report dialog box, click Create. This inserts the command into the measurement routine.
Command Mode
EXCEL_FORM1=EXCELFORMREPORT/TEMPLATE=AS9102, TYPE=XLSX
RESULT FOLDER/C:\Users\Public\Documents\Hexagon\PC-DMIS\2019 R1\ExcelFormReport\Results
Summary Mode

If you do not define the data area, PC-DMIS displays the following message when you click OK.
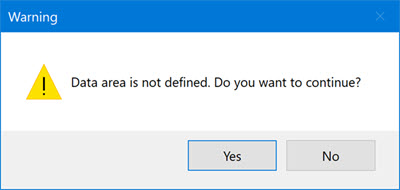
If you click Yes, PC-DMIS still inserts the command into the measurement routine. When you execute the measurement routine, the resultant file doesn't display any measurement data.
You can click No and set the data area to see the measurement data.
You have successfully inserted the Excel Form Report command into your measurement routine.
More: