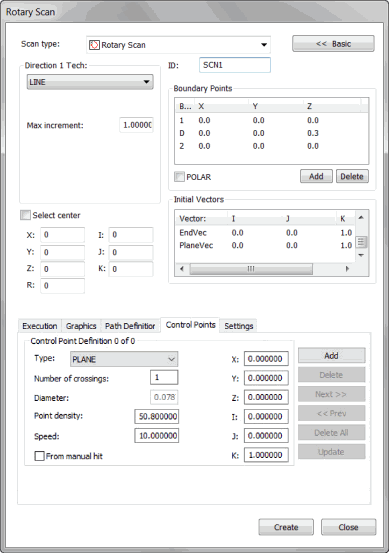

Rotary Scan dialog box
The Insert | Scan | Rotary scan method scans the surface around a given point at a specified radius from that point. The radius will be maintained regardless of surface changes. This procedure uses the starting and ending point for the arc of the measurement. It also includes a direction point to define the direction from start to end.

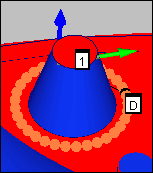
A Sample Rotary Scan Around a Cone
For more details on the Rotary Scan dialog box, see "Common Functions of the Scan Dialog Box" in the PC-DMIS Core documentation.
To Create a Rotary Scan
Ensure that you have a TTP or an analog probe enabled.
Place PC-DMIS into DCC mode.
Select Insert | Scan | Rotary to open the Rotary Scan dialog box.
If you want to use a custom name, type the name of the scan in the ID box.
Determine the center point for the rotary scan. You can do this in one of two ways:
Select the Select Center check box, then click a point on the part.
Manually type the circle's center location into the XYZ and IJK boxes.
Type a radius value for the rotary scan in the R box. Once you type a radius, PC-DMIS draws the location of the scan on the part model in the Graphic Display window.
Verify that the scan's XYZ center and IJK information is correct.
Deselect the Select Center check box.
Select the appropriate technique from the Direction 1 Tech list. Depending on the technique selected, type the appropriate increment and angle values into the Max Incr, Min Incr, Max Angle, and Min Angle boxes.
If your scan traverses multiple surfaces, consider selecting surfaces by using the Select check box as discussed in the "Graphics Tab" topic.
Add the 1 point (starting point), the D point (direction to scan), and the 2 point (ending point) for the rotary scan. This will select a curve to scan. If you wish to scan the entire circumference, delete the 2 point. Pick these boundary points by following an appropriate procedure as discussed in the "Boundary Points area" topic.
Select the appropriate type of hits to take from the Hit Type list in the Hit Controls area.
Make any needed changes to the vectors in the Initial Vectors areas. To do this, double-click on the vector, make any changes to the Edit Scan Item dialog box, and then click OK to return to the Rotary Scan dialog box.
Select the appropriate nominals mode from the Nominals list in the Nominals Method area.
In the Tolerance box in the Nominals Method area, type a tolerance value that at least compensates for the probe's radius.
Select the appropriate execution mode from the Execute list in the Exec Control area.
If you are using a thin part, type the part's thickness in the Thickness box on the Graphics tab.
If needed, select any of the check boxes from the areas on the Execution tab.
If using an analog probe, consider using the Control Points tab to run your scan optimally.
Click the Generate button in the Theoretical Path area on the Path Definitions tab to generate a preview of the scan on the CAD model in the Graphic Display window. When you generate the scan, PC-DMIS starts the scan at the start point and follows the chosen direction until it reaches the boundary point.
If needed, you can delete individual points. To do this, select them one at a time from the Theoretical Path area and press the Delete key.
Make additional modifications to your scan as needed.
Click the Create button. PC-DMIS inserts the scan into the Edit window.