Now that you have finished the previous tutorial step, you can execute your measurement routine.
Many options are available to execute all or a portion of a measurement routine. For details, see the "Executing Measurement Routines" chapter in the PC-DMIS Core documentation.
To avoid damage to the probe, use the jog box to move the probe away from the part.
Select File | Execute to open the Execution dialog box and begin the measurement process.
If PC-DMIS detects an error during the measurement routine execution process, the error appears in the Machine Errors list in the Execution dialog box. You need to resolve the error before the measurement routine can proceed. When you are ready to proceed, click the Continue button to complete the execution of the measurement routine.
For complete information on the options in the Execution dialog box, see "Using the Execution Dialog Box" in the PC-DMIS Core documentation.
Read the instructions in the Execution dialog box. Follow the requests to take the specified hits. Make sure the ruby tip, and not the probe stem, contacts the part.
PC-DMIS detects each hit and automatically displays the message to take the next hit.

Instructions in Execution dialog box
PC-DMIS requests that you manually take these hits with your probe in the approximate location indicated in the Graphic Display window.
Take three hits on the surface to create a plane. Press End.
Take two hits on the edge to create a line. Press End.
Take four hits inside the circle. Press End.
When PC-DMIS takes the last hit on the circle alignment feature (CIR1), it displays some comments and then moves into DCC mode.
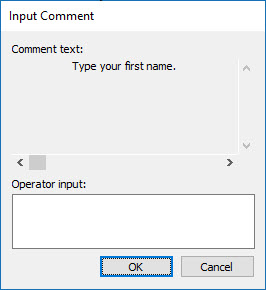
When the Input Comment dialog box appears, in the Operator input box, type your first name:

Input Comment dialog box
PC-DMIS displays the PC-DMIS Message dialog box. For example:

PC-DMIS Message dialog box
For information on how to create a comment in this dialog box, see "Step 11: Add Comments".
Click OK. PC-DMIS measures the rest of the features in DCC mode.
WARNING: When you do this, the machine moves. To avoid injury, stay clear of the machine. To avoid hardware damage, run the machine at a slower speed.
When you are ready to proceed, click the Continue button to complete the execution of the measurement routine.
Go to the next step: "View the Report"