Performing an Area Scan
To perform an Area Scan from the Area
Scan dialog box and create the Area Scan command:
Select a Surface probe.
Open the Area Scan
dialog box from the menu (Insert | Scan | Area
Scan), or click the Area Scan button
 from the Tracker Measure toolbar.
Select an accuracy option from the Accuracy
Settings list of the Area Scan dialog
box. The available options are: Standard,
Fast, and Precise.
Click the Overview Camera
button and define the scan region and settings. When done, click the
"X" in the upper-right of the
Overview Camera window to close it.
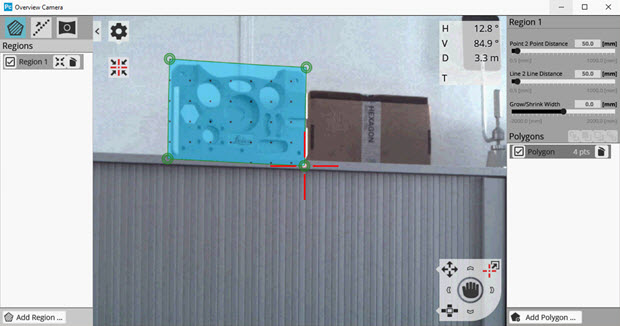
Example of the Overview Camera
window
You define the Region settings in the Overview Camera window. PC-DMIS
stores these settings in the Area Scan command. The Region settings
include the Point 2 Point Distance, Line 2 Line Distance, and the Grow/Shrink
Width.
For details on the Overview Camera window including the Region settings,
see the appropriate Leica manual.
Select the Signal Filter
option from the list
Select the AOI Filter
check box to enable this filter if necessary, and then enter a valid
value.
Select a COP from the ID
list or enter a new COP ID if one does not exist.
Select the Measure
check box if you want to begin measurements immediately after you
close the dialog box.
From Area Scan dialog
box, click Create to add the Area Scan command
into the Edit window, and then click Close
to return to the PC-DMIS main screen.
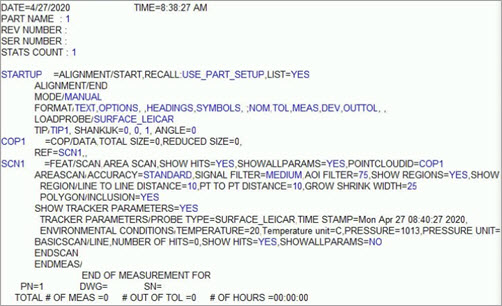
Example of the Edit window
showing the Area Scan command with Region settings
More:
ATS600
Tracker Interface
Area
Scan Dialog Box, Menu, and Toolbar Options
How
to Use the Sphere Probe
Performing
a Ring Scan
Switchable
Portable Interface
Using
the Portable Toolbars
Quick
Start Interface
Portable
Hard Probe Scanning