Completing the Feature Definition Group for a Contour Feature

Use the options in the Feature definition group to define additional values for a Contour feature.

Feature Options

The following graphics show the options for each feature.

The Feature ID and ID boxes display the appropriate ID for the feature.

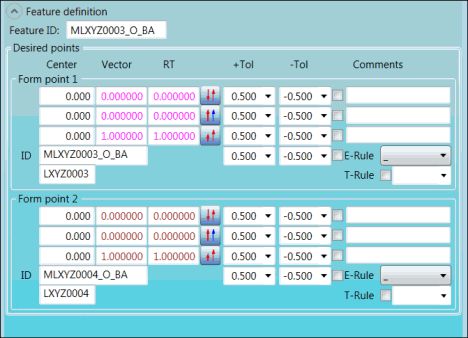
BA feature:

Feature definition group for BA feature

Feature definition group for BA feature

BF feature:
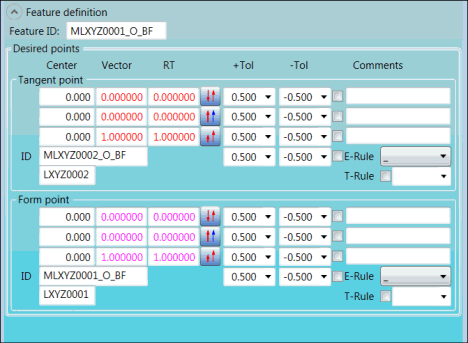
Feature definition group for BF feature

Feature definition group for BF feature

BH feature:
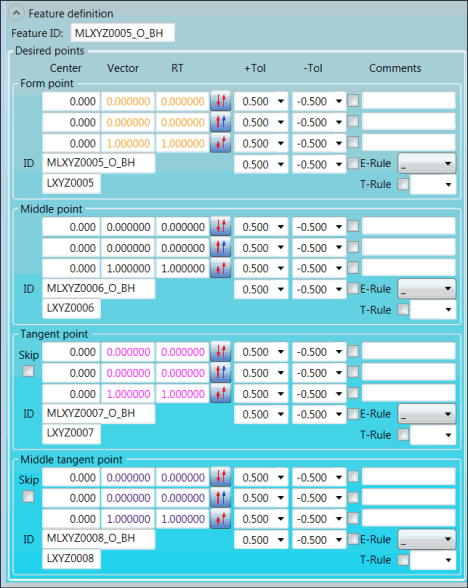
Feature definition group for BH feature

Feature definition group for BH feature

BK feature:
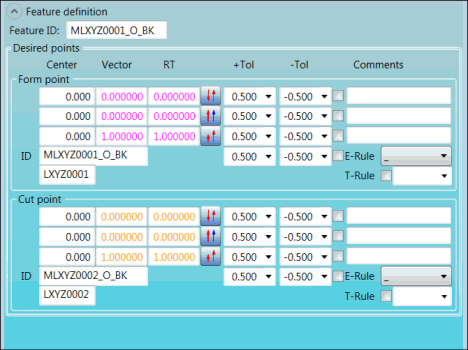
Feature definition group for BK feature

Feature definition group for BK feature

BM feature:
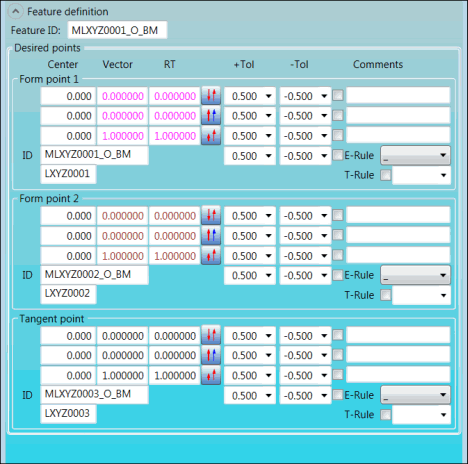
Feature definition group for BM feature

Feature definition group for BM feature

BN feature:
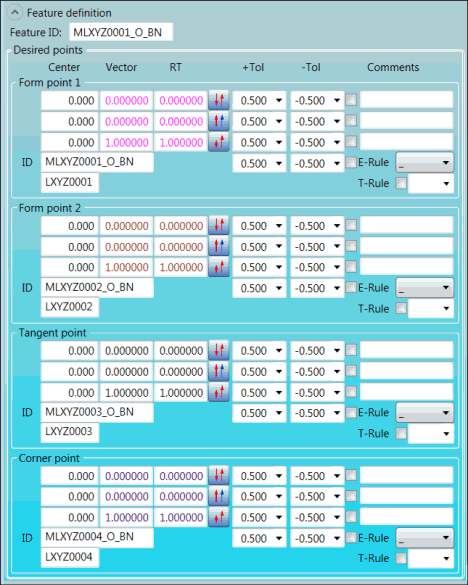
Feature definition group for BN feature

Feature definition group for BN feature

BP feature:
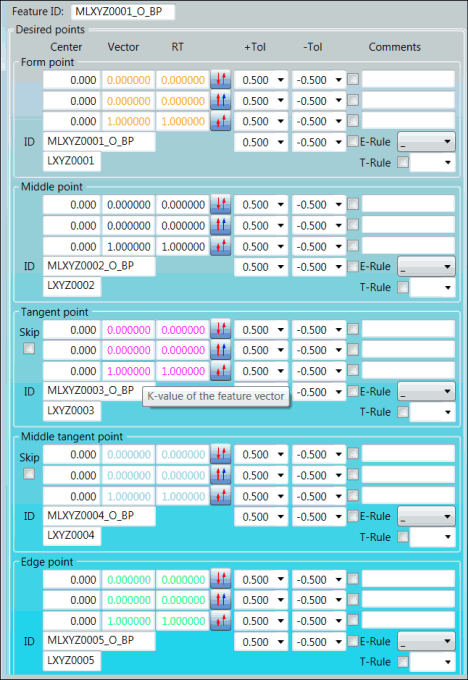
Feature definition group for BP feature

Feature definition group for BP feature

Descriptions

The following table describes the options.

For descriptions of the icons that appear in this group, see "Using the Icons".

Item

Description

Feature ID box

This box displays the combination of letters and numbers that identify the feature.

Desired points area

When you hover your pointer over an option in this area, a screen tip about the option appears.

These areas all share the items below:

Form point area (BF, BH, BK, and BP)
Form point 1 and Form point 2 areas (BA, BM, and BN)
Cut point area (BK)
Edge point area (BP)
Tangent point area (BF, BH, BM, BN, and BP)
Middle tangent point area (BH and BP)

  • Center boxes: These boxes display the X, Y, and Z coordinates of the feature.

  • Vector boxes: These boxes display the I, J, and K values of the feature's vector for the measurement.

  • RT boxes: Type the I, J, and K values of the feature's RT (report vector) for the evaluation of the point.

  • +Tol lists: Select the upper tolerances for the X, Y, Z, and RT dimension axes.

  • -Tol lists: Select the lower tolerances for the X, Y, Z, and RT dimension axes.

  • Output X-axis, Output Y-axis, Output Z-axis, and Output RT-axis check boxes: To print tolerances to the Edit window and to reports (when PC-DMIS is set up to store information in a format to be viewed textually), select the check box for each tolerance you want to print. The check box for each axis that needs to be evaluated, according to the option you select in the E-Rule list, is automatically selected (and greyed out). You can change these check boxes only by selecting a different option in the E-Rule list.

  • Comments boxes: Type comments in these boxes. The comments appear in front of the dimensions in reports when PC-DMIS is set up to store information in a format to be viewed textually.

  • E-Rule list: Select the E-Rule (evaluation rule), which defines the axis that are tolerated. To view the description of an option, hover your pointer over the option. The option that you select becomes part of the ID in the ID box.

  • T-Rule box: Use this box to save the current tolerances in a T-Rule (tolerance rule). This is useful for tolerances that are used often, such as -0.3 and 0.3. You can also recall the tolerances for an existing T-Rule and delete a T-Rule.

    • To save the current tolerances in the +Tol and -Tol lists, type a name for the T-Rule in the T-Rule box, right-click in the box, and select Save:

Save and Delete options

Save and Delete options

The T-Rule appears in the list.

    • To recall the tolerances for an existing T-Rule, select the rule in the list.

    • To delete a T-Rule, select the rule that you want to delete, right-click, and select Delete.

  • ID box: This box displays the ID of the feature. The ID of the dimension appears underneath this box.

Middle point area (BH and BP): For a complete description, refer to MID_PT in the VW 101 26: 2011-03 standard.

Skip check box (BH and BP): This option is available for optional tangent and middle tangent points. Select this check box if you do not want to measure the corresponding tangent point.

Corner point area (BN): For a complete description, refer to COR_PT in the VW 101 26: 2011-03 standard.

Example

The following is an example of a Feature definition group for the BA feature and the corresponding Edit window:

Example of BA feature
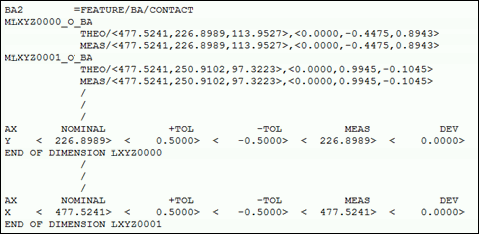
Example of BA feature

Example of Edit window

Example of Edit window

More:

Completing the CAD Selection Group

Completing the General Feature Parameters Group